Documentation by “DedalX”
SimpleGreat OpenCart Theme
Updated: 14/06/2013
By: DedalX
www: http://dedalx.com
Email: dedalx.rus@gmail.com
Thank you for purchasing my theme! If you have any questions that are beyond the scope of this help file, please use our support system. Thanks so much!
Subscribe for FREE themes updates and news: Facebook or Twitter
Table of Contents
- Overview
- Theme installation
- Revolution Slider setup
- Manage theme layout (1, 2 or 3 columns)
- Theme modules and blocks setup
- Blog Manager configuration and usage
- Twitter setup
Theme administration panel guide: - Theme administration panel usage Advanced information:
- Project structure
- Contacts and support
A) Overview - top
SimpleGreat is a universal OpenCart 1.5.5.x theme with stylish design and powerful backend.
Clean and modern theme design allows you to use this theme for every kind of online shop.
Unlimited theme colors, hundreds of available theme fonts, dozens of features, settings and advanced powerful backend administration theme panel allows you to make your own unique themes from this one, without special programmer or designers skills!
Please, dont forget to leave a stars rating for this theme! Go to "Downloads" tab in your ThemeForest account ( http://themeforest.net/user/YOUR-LOGIN/downloads - change YOUR-LOGIN to your nickname), find my theme and click to rate! This helps for making future theme updates and new features!
B) Theme installation - top
- I recommend you to read OpenCart documentation to get know how to use all features in this engine.
- Check your hosting/server to be shure that PHP settings "short_open_tag" is set to ON. Contact your hosting probider if you dont know how to set this PHP value, before installing theme. If your short_open_tag = OFF you will get error "unexpecting end of file" after theme installation.
- First of all install latest (1.5.5.x) official Open Cart version from Open Cart website. If your have older OpenCart update it to 1.5.5.1 or newest version.
- Open folder UPLOAD from purchased archive and upload all content inside it (folders image, catalog and admin) to your installed Open Cart directory:
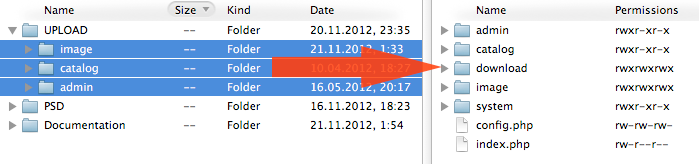
You can Drag and drop the admin, image and catalog folders into your site using your favourite FTP client (If you don’t have one, we recommend Filezilla).
If you are Mac OS user we strongly recomend to use FileZilla client for theme upload, becouse MacOS finder can replace folders with files incorrect!
You will be asked if you want to replace some of the files from your current installation - you must click YES to replace all files.
Don't worry - no core files will be replaced, all your old modules and themes will works as always.
- Go to your open cart directory /image/data in FTP client, and setup write premissions (chmod 666) for file theme_colors.sgt:

- This theme support localization for multi language store for custom theme items and titles.
You will need to copy file "language/english/module/simplegreat.php" from archive UPLOAD folder to ALL language folders that you have in your OpenCart installation (to language/YOUR_LANGUAGE_HERE/module/simplegreat.php). You need to translate this file for any language that you have with text editor. - Go to your Open Cart admin panel System > Settings > Edit. Click Store tab and choose simplegreat theme for "Template" option. This action will activate your new theme.
- Go to your Open Cart admin panel System > Settings > Edit. Click Image tab to open Image settings.
Setup this image sizes:
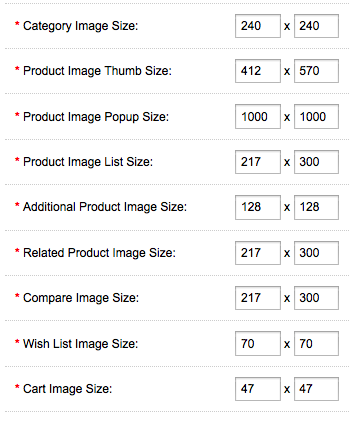
- IMPORTANT: If you want that your category and subcategory images will fit theme nice (like on demo site) we recomend your to use 240x240 px image size for your category images.
- IMPORTANT: If you want that your product images and thumbnails will fit theme nice (like on demo site) we recomend your to use 1000x1383 px image size for your product photos! (or other size proportional to this size).
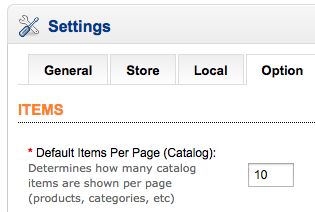
- Go to your Open Cart admin panel System > Settings > Edit. Click Option tab and set Default item per page value to 10:
- In your Open Cart admin go to Extensions > Modules.
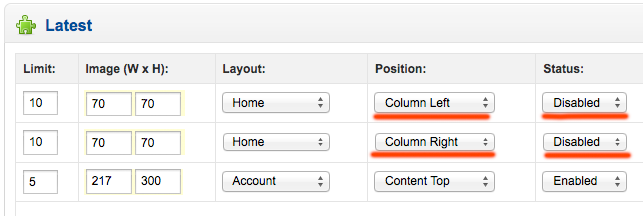
In ANY module with product display (Features, Bestsellers, Latest, Special, etc) that you want to use now or later in CONTENT TOP or CONTENT BOTTOM position you must set correct image size (217x300) for product display and limit 10 (or 20, 30, etc):
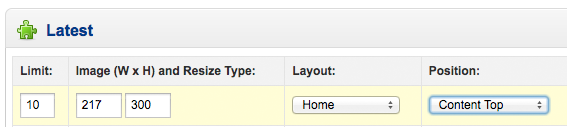
This will look like this on site:
- In your Open Cart admin go to Extensions > Modules.
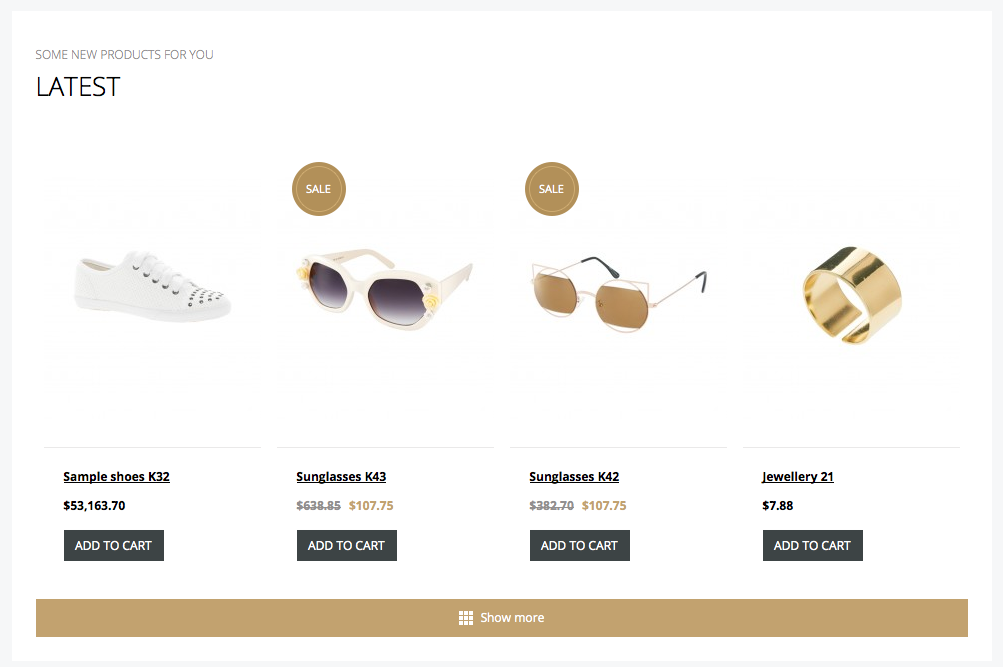
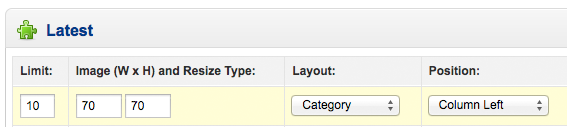
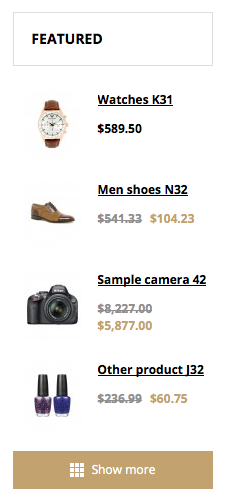
In ANY module with product display (Features, Bestsellers, Latest, Special, etc) that you want to use now or later in CONTENT LEFT or CONTENT RIGHT position you must set correct image size (70x70) for product display and limit 10 (or 20, 30, etc):
This will look like this on site:
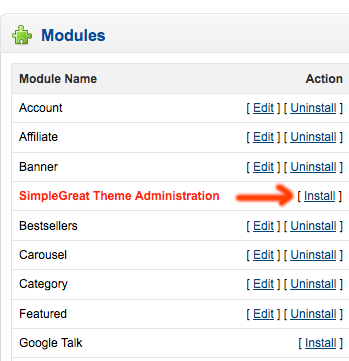
- In your Open Cart admin go to Extensions > Modules and click Install near to "SimpleGreat Theme Administration" moduie:
- In your Open Cart admin go to Extensions > Modules and click Edit near to "SimpleGreat Theme Administration" moduie. You will open theme control panel.
- Choose "Enable" for Custom theme options:

- Click "Save settings theme settings" button first time, becouse you use this module firstly and must init theme settings.
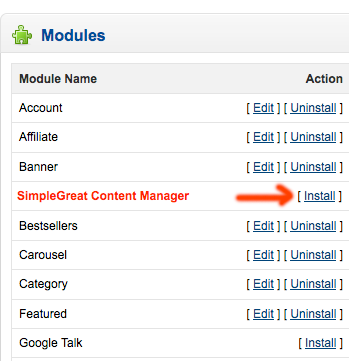
- In your OpenCart admin go to Extensions > Modules and click Install near to "SimpleGreat Content Manager" moduie:
- In your Open Cart admin go to Extensions > Modules and click Install near to "SimpleGreat Blog Manager" moduie:
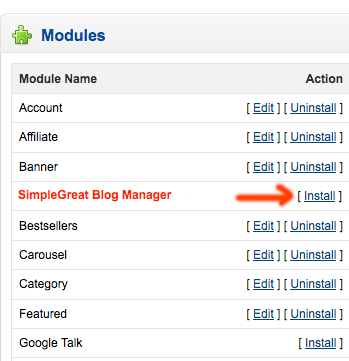
- Click "Edit" at the right of SimpleGreat Blog Manager to install database tables and config for this module. If you don't do this step you will get multiple errors in admin panel and frentend.
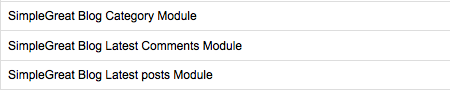
- In your Open Cart admin go to Extensions > Modules and click Install near to additional blog manager modules:
- You can add/change your site logo in System > Settings > Image > Store logo.
Recommended logo height is 36px.
Now modules is setuped to work with Theme, but you need to configure some features that you need in this theme admin panel, configurate and enable custom footer, etc.
C) Revolution Slider setup - top
This theme have 2 built in slider - simple Flexslider for display slider images, and powerful Revolution slider.
You can setup Flexslider like standard OpenCart slider (with Extensions > Modules > Slideshow module), by OpenCart documentation.
Revolution slider support dozens of tranzitions and effects for each slide, emeding video in slider and more awesome features. You can use simple sildes or create very powerful combined animation sliders by advanced Revolution Slider documentation (You can open it in "Slider Documentation/documentation.html" in purchased archive), but first of all you need to create sample Revolution Slider with sample content:
- Go to Extensions > Modules > Slideshow and delete/disable all your existing sliders in this module (or just Uninstall this module). If you used some other sliders module (for example Flexslider module) disable it too.
- Go to Extensions > Modules > BeautyShop Theme Administration (click Edit button at the right). You will see theme admin panel.
- Click Revo Slider section in left menu.
- Enable Revolution slider:
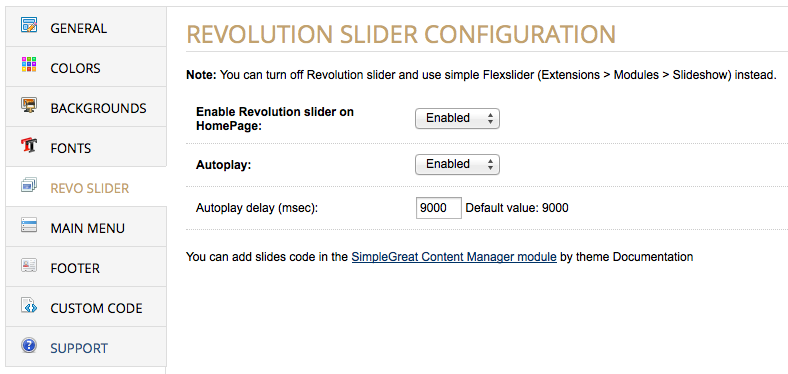
- Click "Save theme settings".
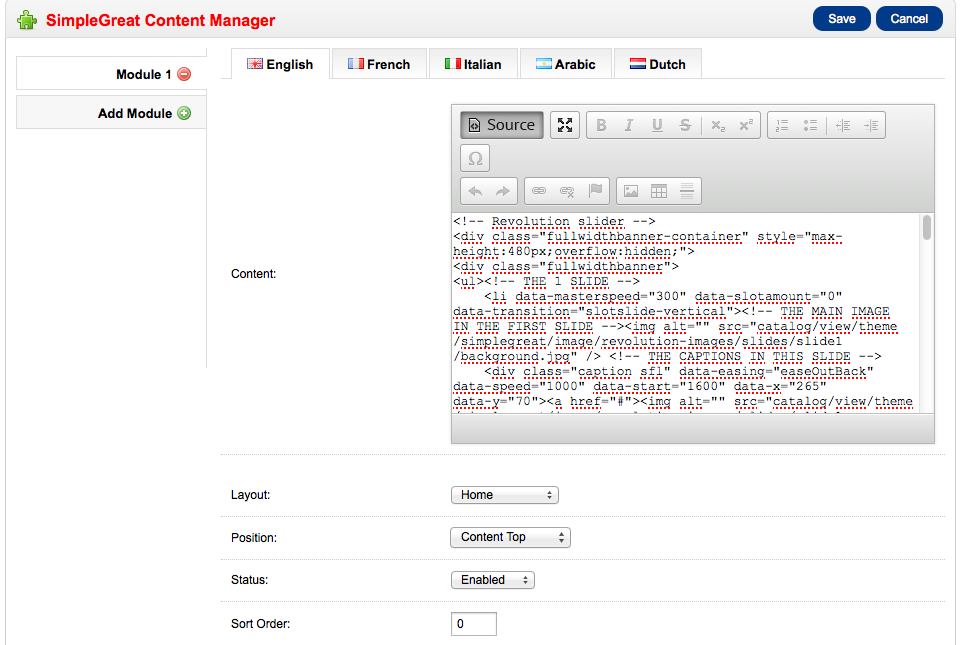
- Go to Extensions > Modules > SimpleGreat Content Manager (click Edit button at the right). This module allow you to add any html blocks to any shop pages to any position. You can create your own blocks in this module too.
- Click Add module button at the left.
- Choose "Home" for Layout option, "Content top" for Position and 0 for "Sort Order" to display slider before all your other modules.
- Click Source button in Content area visual editor to switch editor to HTML mode.
- Copy and paste code below to Content textarea in admin panel:
<!-- Revolution slider -->
<div class="fullwidthbanner-container" style="max-height:480px;overflow:hidden;">
<div class="fullwidthbanner">
<ul><!-- THE 1 SLIDE -->
<li data-masterspeed="300" data-slotamount="0" data-transition="slotslide-vertical"><!-- THE MAIN IMAGE IN THE FIRST SLIDE --><img alt="" src="catalog/view/theme/simplegreat/image/revolution-images/slides/slide1/background.jpg" /> <!-- THE CAPTIONS IN THIS SLIDE -->
<div class="caption sfl" data-easing="easeOutBack" data-speed="1000" data-start="1600" data-x="265" data-y="70"><a href="#"><img alt="" src="catalog/view/theme/simplegreat/image/revolution-images/slides/slide1/objects.png" /></a></div><div class="caption sfr revolution_header1" data-easing="easeOutBack" data-speed="500" data-start="800" data-x="295" data-y="210">This is the most beautiful<br />
theme with minimal style</div><div class="caption sfb" data-easing="easeOutBack" data-speed="500" data-start="1200" data-x="375" data-y="323"><a href="#"><img alt="" src="catalog/view/theme/simplegreat/image/revolution-images/slides/button.png" /></a></div>
</li>
<!-- THE 2 SLIDE -->
<li data-masterspeed="300" data-slotamount="0" data-transition="curtain-3"><img alt="" src="catalog/view/theme/simplegreat/image/revolution-images/slides/slide2/background.jpg" /> <!-- THE CAPTIONS IN THIS SLIDE -->
<div class="caption sfl" data-easing="easeOutBack" data-speed="1000" data-start="1600" data-x="265" data-y="70"><a href="#"><img alt="" src="catalog/view/theme/simplegreat/image/revolution-images/slides/slide2/objects.png" /></a></div><div class="caption sfr revolution_header1" data-easing="easeOutBack" data-speed="500" data-start="800" data-x="305" data-y="210">Adaptive theme design<br />
for tablets and mobile</div><div class="caption sfb" data-easing="easeOutBack" data-speed="500" data-start="1200" data-x="375" data-y="323"><a href="#"><img alt="" src="catalog/view/theme/simplegreat/image/revolution-images/slides/button.png" /></a></div>
</li>
<!-- THE 3 SLIDE -->
<li data-masterspeed="300" data-slotamount="0" data-transition="boxfade"><img alt="" src="catalog/view/theme/simplegreat/image/revolution-images/slides/slide3/background.jpg" /> <!-- THE CAPTIONS IN THIS SLIDE --> <!-- THE CAPTIONS IN THIS SLIDE -->
<div class="caption sfl" data-easing="easeOutBack" data-speed="1000" data-start="1600" data-x="265" data-y="70"><a href="#"><img alt="" src="catalog/view/theme/simplegreat/image/revolution-images/slides/slide3/objects.png" /></a></div><div class="caption sfr revolution_header1" data-easing="easeOutBack" data-speed="500" data-start="800" data-x="285" data-y="210">With 300+ features, options<br />
and settings</div><div class="caption sfb" data-easing="easeOutBack" data-speed="500" data-start="1200" data-x="375" data-y="323"><a href="#"><img alt="" src="catalog/view/theme/simplegreat/image/revolution-images/slides/button.png" /></a></div>
</li>
</ul><div class="tp-bannertimer"> </div>
</div>
</div>
<!-- / Revolution slider -->
- You should see something like this now:
This is Sample Revolution Slider code with 3 sample slides with different animations and effects.
- If you have different languages on your site you should repeat this steps for every language tab (you can show different slides for different languages).
- Click Save button.
- You should add your own slides in Slides code textarea or change sample slides with your data and images.
Read Revolution Slider documentation (You can open it in "Slider Documentation/documentation.html" in purchased archive) to know how to make your own slides in Revolution Slider.
You don't need to integrate this slider to theme (this is already done), you just need to read about creating slides in Layout / 02 Slider items help section in Revolution Slider documentation.
Please note: We do not develop Revolution slider and don't provide any support for this slider. You can get Slider support at ThemePunch support website.
All sample Slider images located at "catalog/view/theme/simplegreat/image/revolution-images/slides" , you can change just it and change links on links/buttons in sample sliders code.
If you want to add your own sliders do it by Revolution Slider documentation, and input slides code to Slides code in theme admin panel.
D) Manage theme layout (1, 2 or 3 columns) - top
This theme support different content layouts but with little limitations below, you can use one, two or three columns in your theme, and use its different combinations in your store pages.
Theme pages support this layouts:
Home Page, Product Page - 1 column layout (2 and 3 columns layout on this pages is not supported)
Category Page, Search page, Manufacturers page, Informational pages, Account page - 1 column, 2 column and 3 column layouts
If you want to use 1 column layout on some shop pages:
- Go to Extensions > Modules, click Edit near EVERY module that you use and DISABLE all modules from displaying in Content Left and Content Right positions. You can show your modules in Content top and Content Bottom positions only if you want to get 1 column layout for your theme:
If you want to use 2 column layout on some shop pages:
- Go to Extensions > Modules, click Edit near EVERY module that you use and enable some modules for Content Left position OR for Content Right position. You can show your modules in Content top and Content Bottom positions too.
If you want to use 3 column layout on some shop pages:
- Go to Extensions > Modules, click Edit near EVERY module that you use and enable some modules for Content Left position AND some modules for Content Right position. You can show your modules in Content top and Content Bottom positions too.
E) Theme modules and blocks setup - top
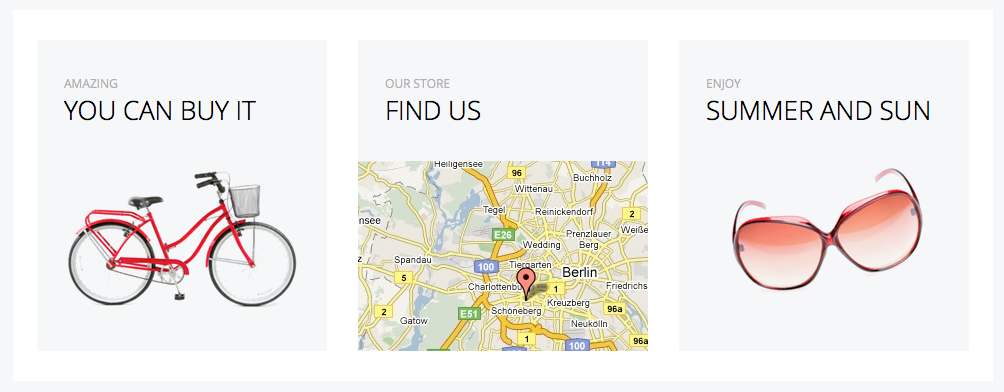
Promo block setup
You can show promo block with some additional info or banners on your home page below the slider:
To enable this feature:
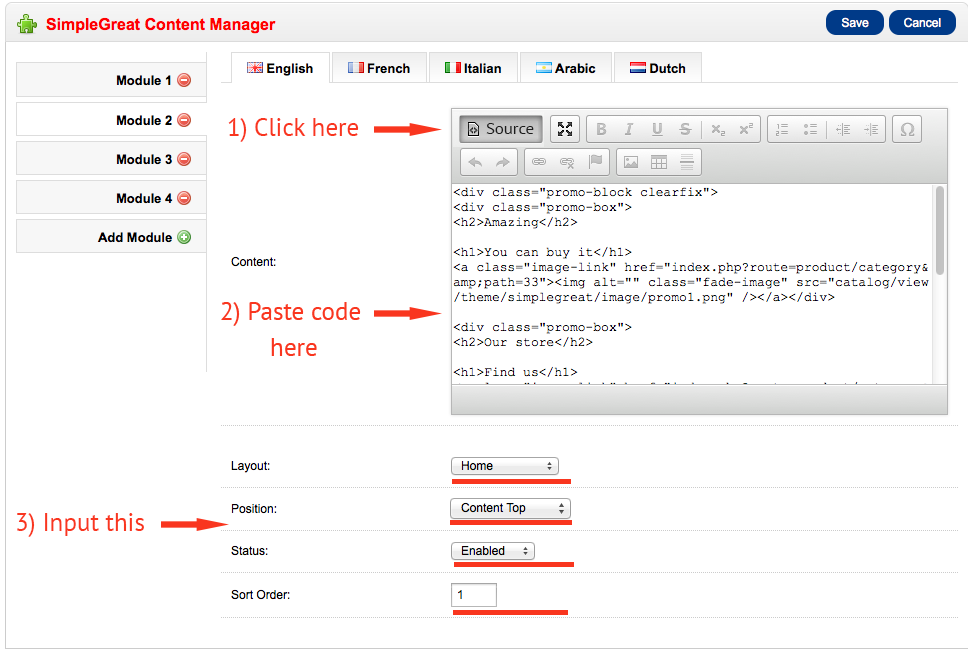
- Go to Extensions > Modules > SimpleGreat Content Manager (click Edit button at the right). This module allow you to add any html blocks to any shop pages to any position. You can create your own blocks in this module too.
- Click Add module button at the left.
- Choose "Home" for Layout option, "Content top" for Position and 1 for "Sort Order" to display promo content after your slider.
- Click Source button in Content area visual editor to switch editor to HTML mode.
- Copy and paste code below to Content textarea in admin panel:
<div class="promo-block clearfix">
<div class="promo-box">
<h2>Amazing</h2><h1>You can buy it</h1>
<a class="image-link" href="#"><img alt="" class="fade-image" src="catalog/view/theme/simplegreat/image/promo1.png" /></a></div><div class="promo-box">
<h2>Our store</h2><h1>Find us</h1>
<a class="image-link" href="#"><img alt="" class="fade-image" src="catalog/view/theme/simplegreat/image/promo2.png" /></a></div><div class="promo-box">
<h2>Enjoy</h2><h1>Summer and sun</h1>
<a class="image-link" href="#"><img alt="" class="fade-image" src="catalog/view/theme/simplegreat/image/promo3.png" /></a></div>
</div>
- You should see something like this now:
This is Sample code for promo block content.
- If you have different languages on your site you should repeat this steps for every language tab (you can show different content for different languages).
- You can change "#" to your image link if your wish to make a link to images. You can add your text or images too.
Recommended image sizes for banners: 290x190px
- Click Save button.
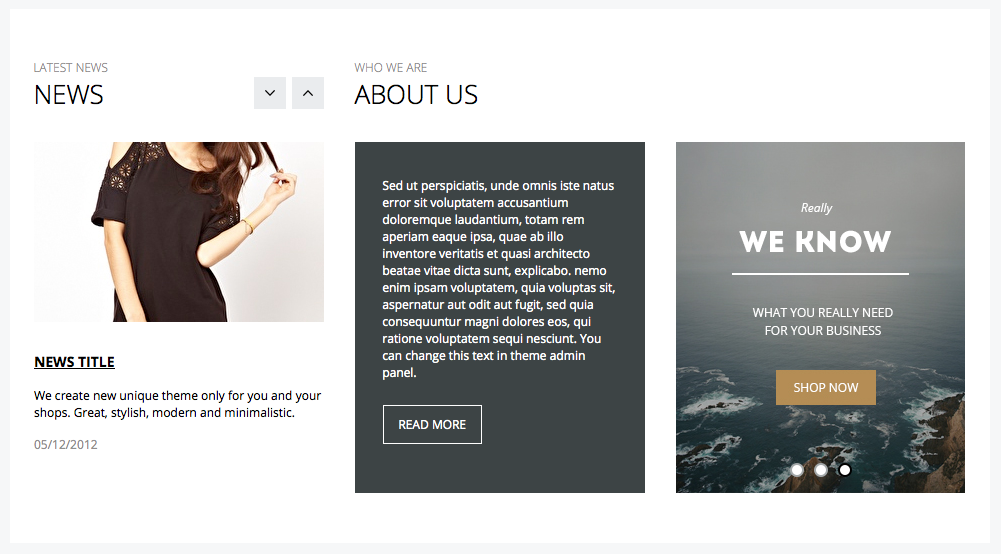
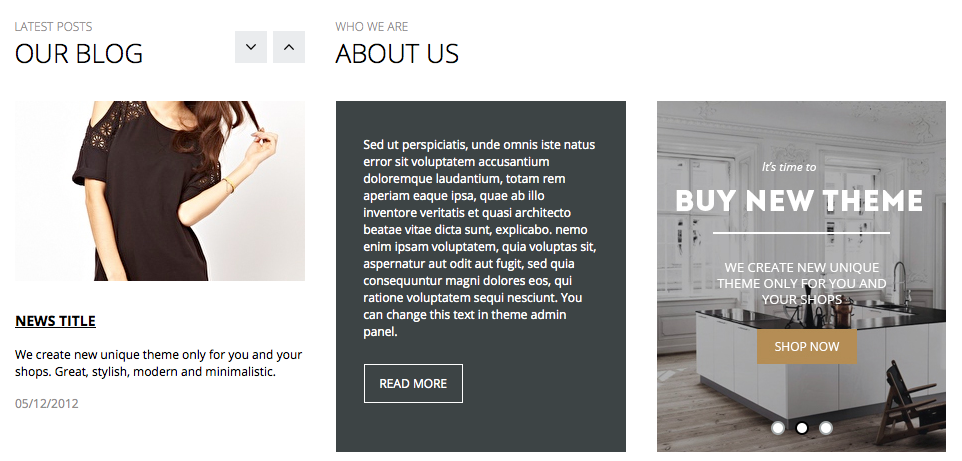
About shop block setup (news+about+ads slider)
You can show about shop block with news slider (or blog posts), about us text and additional banners slider:
To enable this feature:
- Go to Extensions > Modules > SimpleGreat Content Manager (click Edit button at the right). This module allow you to add any html blocks to any shop pages to any position. You can create your own blocks in this module too.
- Click Add module button at the left.
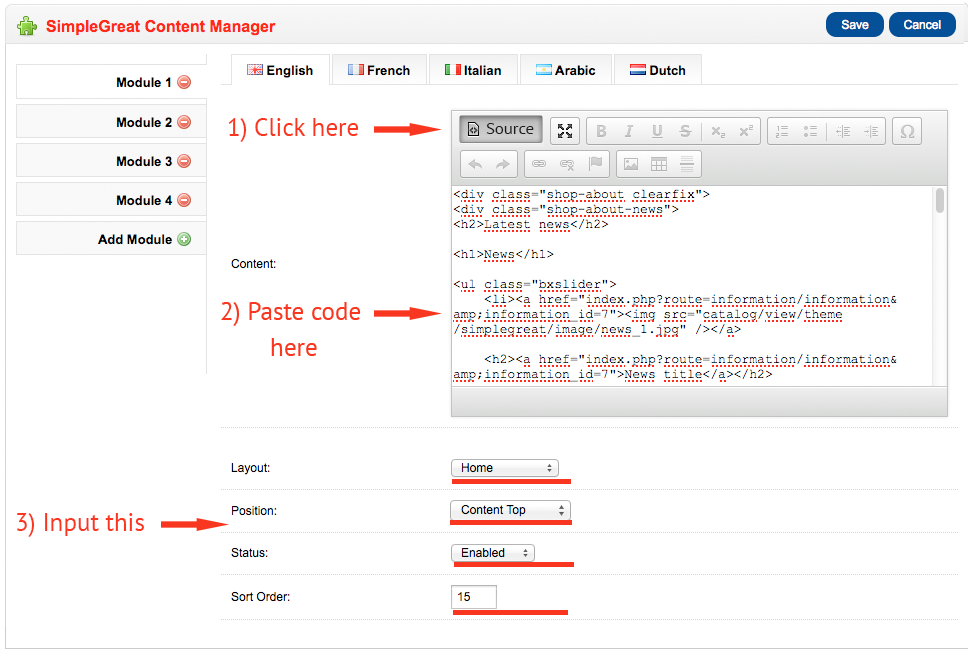
- Choose "Home" for Layout option, "Content top" for Position and 15 for "Sort Order" to display block in the middle of all your other modules (you will need to change your other modules Sort order to value less or more than 15 to display it before or after this block).
- Click Source button in Content area visual editor to switch editor to HTML mode.
- Copy and paste code below to Content textarea in admin panel:
<div class="shop-about clearfix">
<div class="shop-about-news">
<h2>Latest news</h2><h1>News</h1>
<ul class="bxslider">
<li><a href="#"><img src="catalog/view/theme/simplegreat/image/news_1.jpg" /></a><h2><a href="#">News title</a></h2>
<div class="text">We create new unique theme only for you and your shops. Great, stylish, modern and minimalistic.</div>
<div class="date">05/12/2012</div>
</li>
<li><a href="#"><img src="catalog/view/theme/simplegreat/image/news_2.jpg" /></a>
<h2><a href="#">News title</a></h2><div class="text">We create new unique theme only for you and your shops. Great, stylish, modern and minimalistic.</div>
<div class="date">05/12/2012</div>
</li>
<li><a href="#"><img src="catalog/view/theme/simplegreat/image/news_3.jpg" /></a>
<h2><a href="#">News title</a></h2><div class="text">We create new unique theme only for you and your shops. Great, stylish, modern and minimalistic.</div>
<div class="date">05/12/2012</div>
</li>
</ul>
</div><div class="shop-about-text">
<h2>Who we are</h2><h1>About us</h1>
<div class="text">Sed ut perspiciatis, unde omnis iste natus error sit voluptatem accusantium doloremque laudantium, totam rem aperiam eaque ipsa, quae ab illo inventore veritatis et quasi architecto beatae vitae dicta sunt, explicabo. nemo enim ipsam voluptatem, quia voluptas sit, aspernatur aut odit aut fugit, sed quia consequuntur magni dolores eos, qui ratione voluptatem sequi nesciunt. You can change this text in theme admin panel.
<div><a class="more" href="index.php?route=information/contact">Read more</a></div>
</div>
</div><div class="shop-about-slider">
<ul class="bxslider">
<li><a href="#"><img src="catalog/view/theme/simplegreat/image/about-slide1.jpg" /></a></li>
<li><a href="#"><img src="catalog/view/theme/simplegreat/image/about-slide2.jpg" /></a></li>
<li><a href="#"><img src="catalog/view/theme/simplegreat/image/about-slide3.jpg" /></a></li>
</ul>
</div>
</div>
- You should see something like this now:
This is Sample code with 3 sample news, about us text and slider with 3 ads images.
- If you have different languages on your site you should repeat this steps for every language tab (you can show different content for different languages).
- You can change "#" to your image link if your wish to make a link to images. You can add your text or images too.
Recommended image sizes for news images: 290x180px
Recommended image sizes for ads slider images: 289x351px
- Click Save button.
- If you want to show blog posts from SimpleGreat Blog Manager in news slider read Blog Manager documentation section.
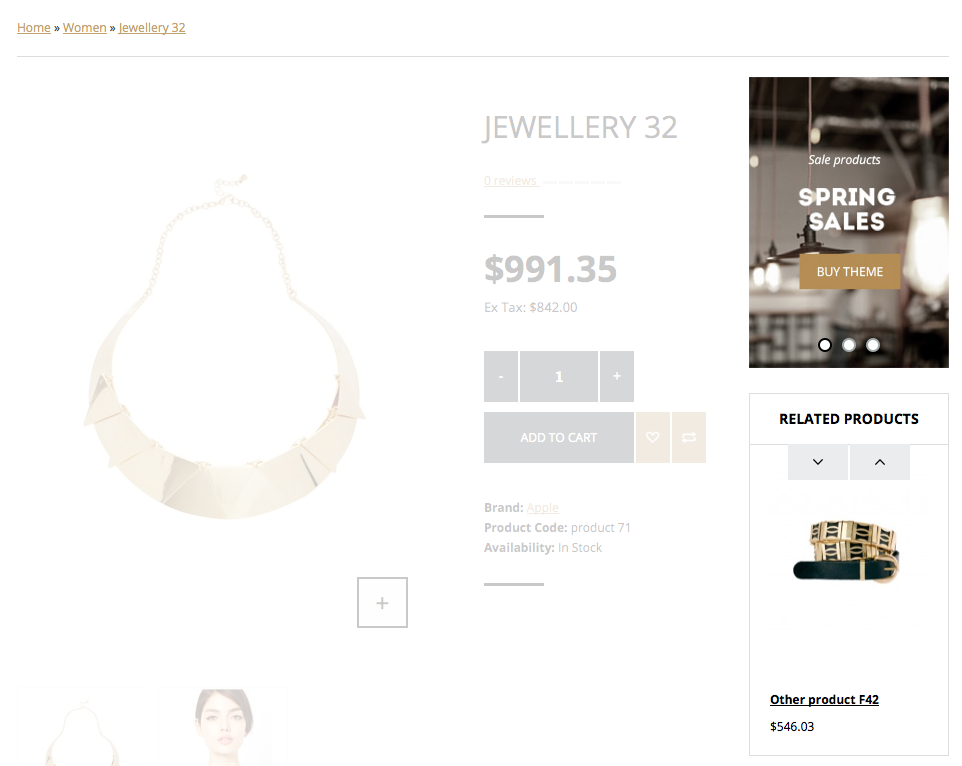
Product page right sidebar setup
You can show banners slider and related product sidebar on Product page right sidebar or add your own HTML content to this area:
To enable this feature:
- Go to Extensions > Modules > SimpleGreat Theme Administration (click Edit button at the right). You will see theme admin panel.
- Click General section in left menu.
- Click "Product page" tab.
- Enable "Show right sidebar" option.
- Click Source button in Right sidebar content area visual editor to switch editor to HTML mode.
- Copy and paste code below to Right sidebar content textarea in admin panel:
<div class="promo-image bxslider2" style="overflow:hidden;max-height:291px">
<a href="#"><img src="catalog/view/theme/simplegreat/image/product-banner-1.jpg" /></a> <a href="#"><img src="catalog/view/theme/simplegreat/image/product-banner-2.jpg" /></a> <a href="#"><img src="catalog/view/theme/simplegreat/image/product-banner-3.jpg" /></a>
</div>
- You should see something like this now:

This is Sample product page slider code with 3 sample slides images.
Recommended image sizes for slider images: 200x291px;
You can change "#" to your image link if your wish to make a link to images or add your own images or other content to right sidebar.
You should change max-height:291px value in code to your images/content height for this block. If you don't use slider here you can just delete this.
- If you want to show Related products slider in right sidebar on product page you need to change "Related products display:" to "Slider in right sidebar" value.
- Click Save theme settings button.
Newsletter subscribe block setup
You can show newsletter subscribe box on your site:

Our theme newsletter block integrated with Mailchimp mail service, but you can edit form html code to use your other newsletter/subscribe services or scripts.
To enable this feature:
- Go to Extensions > Modules > SimpleGreat Content Manager (click Edit button at the right). This module allow you to add any html blocks to any shop pages to any position. You can create your own blocks in this module too.
- Click Add module button at the left.
- Choose "Home" for Layout option, "Content top" for Position and 25 for "Sort Order" to display block after all your other modules.
- Click Source button in Content area visual editor to switch editor to HTML mode.
- Copy and paste code below to Content textarea in admin panel:
<div class="shop-newsletter clearfix">
<div class="subscribe-logo">Need help? <a href="#">mail us</a></div><div class="subscribe-form"><!-- Begin MailChimp Signup Form -->
<div id="mc_embed_signup">
<form action="http://appreviewservice.us2.list-manage.com/subscribe/post?u=5637c5d55f7db55dba7d2cda4&id=b1ecefacf3" class="validate" id="mc-embedded-subscribe-form" method="post" name="mc-embedded-subscribe-form" novalidate="" target="_blank"><label for="mce-EMAIL">Newsletter</label> <input class="email" id="mce-EMAIL" name="EMAIL" placeholder="Input your email address" required="" type="email" value="" /> <input class="button" id="mc-embedded-subscribe" name="subscribe" type="submit" value="Subscribe" /> </form>
</div>
<!--End mc_embed_signup--></div>
</div>
- You should see something like this now:

- If you have different languages on your site you should repeat this steps for every language tab (you can show different content for different languages).
- You need to change bold code to your Mailchimp subscribe form url:
- Register in MailChimp service
- Create and setup your campaign ( read MailChimp documentation if your don't know how to do this)
- Go to your Campaign page and click "Design Signup Forms" button.
- Create simple form with just Email field and Subscribe button.
- Click "Share It" tab in form designer page.
- Click "Create HTML code for a small subscribe form" button at the right. You will see your form HTML code, something like this:
<!-- Begin MailChimp Signup Form -->
<link href="http://cdn-images.mailchimp.com/embedcode/slim-081711.css" rel="stylesheet" type="text/css">
<style type="text/css">
#mc_embed_signup{background:#fff; clear:left; font:14px Helvetica,Arial,sans-serif; }
/* Add your own MailChimp form style overrides in your site stylesheet or in this style block.
We recommend moving this block and the preceding CSS link to the HEAD of your HTML file. */
</style>
<div id="mc_embed_signup">
<form action="http://appreviewservice.us2.list-manage.com/subscribe/post?u=5637c5d55f7db55dba7d2cda4&id=1ded1c0dba" method="post" id="mc-embedded-subscribe-form" name="mc-embedded-subscribe-form" class="validate" target="_blank" novalidate>
<label for="mce-EMAIL">Subscribe to our mailing list</label>
<input type="email" value="" name="EMAIL" class="email" id="mce-EMAIL" placeholder="email address" required>
<div class="clear"><input type="submit" value="Subscribe" name="subscribe" id="mc-embedded-subscribe" class="button"></div>
</form>
</div><!--End mc_embed_signup-->
- You need to find a "<form action=" value (this is your submit form url for your campaign). Copy and paste this url to your form url in Simplegreat Content Manager.
- Click Save button.
F) Blog Manager configuration and usage - top
This theme come with SimpleGreat Blog Manager extension that allow you to make real blog on your OpenCart website, with posts, categories, users, comments and other features that have every blog site.
Blog Manager Basic configuration
Blog manager have many configuration options that you can manage from admin panel, we will talk about some basic steps to make theme work with blog manager, but you can adjust other options too:
- Go to Extensions > Modules >SimpleGreat Blog Manager (click Edit button at the right). This is main Blog Manager module, you can configure everything in your blog from this page.
- Click Modules Settings icon:
- Change your General settings by this image values:
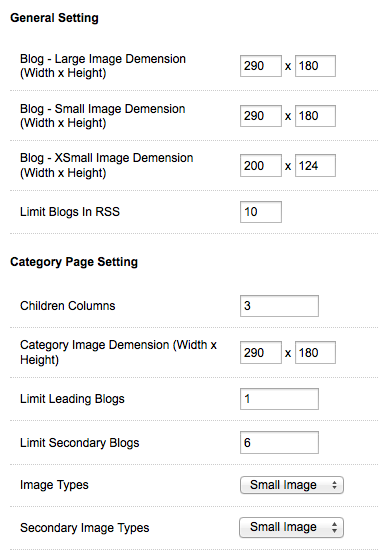
- Click Save button.
Managing Blog Categories
You can have different blog categories and subcategories.
To add/change blog categories:
- o to Extensions > Modules >SimpleGreat Blog Manager (click Edit button at the right).
- Click Add category icon:
- You can manage your blog categories in the left categories tree. If you want to edit existing category click "pen" edit icon at the right side from category.
- You can add new category at the form at the right side
- Click Save button.
Managing Blog Posts
To add new blog post:
- Go to Extensions > Modules >SimpleGreat Blog Manager (click Edit button at the right). This is main Blog Manager module, you can configure everything in your blog from this page.
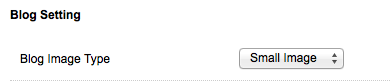
- Click Add blog icon:
- Input your blog post settings and data. You can add image to blog post - recommended image size for blog image to fit theme nice - 290x180px
- Click Save button.
To edit existing blog post:
- Go to Extensions > Modules >SimpleGreat Blog Manager (click Edit button at the right). This is main Blog Manager module, you can configure everything in your blog from this page.
- Click Manage blogs icon:
- Edit post that you need.
- Click Save button.
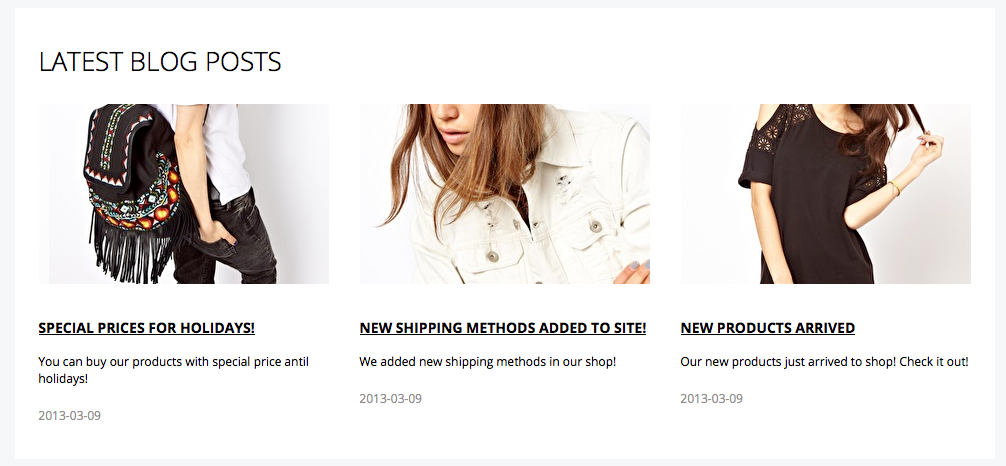
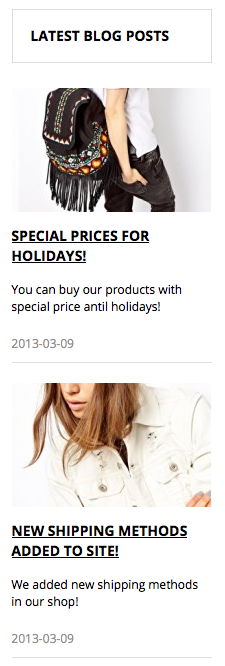
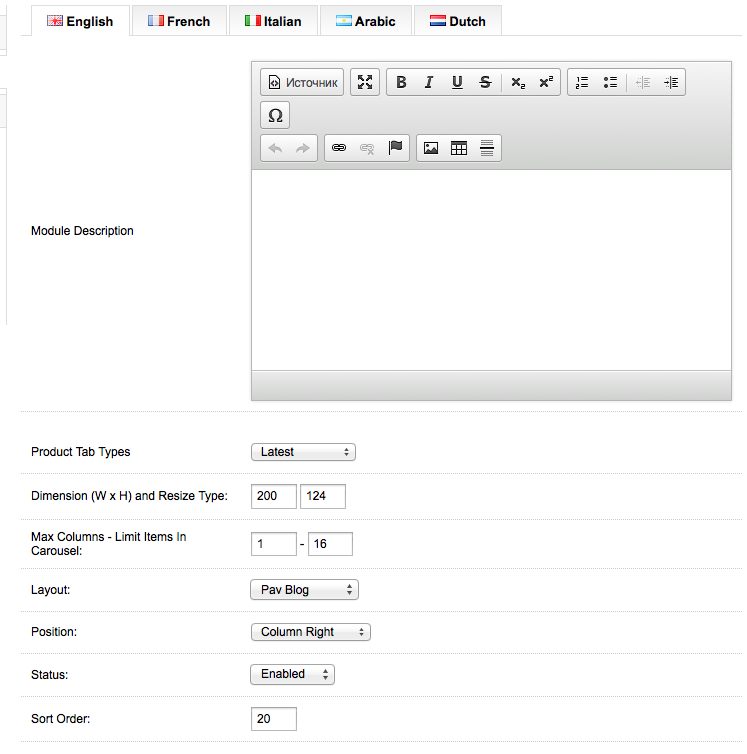
Latest Blog Posts module
You can show latest blog posts from some or all blog categories in frontend (in main content area or left/right site sidebars).
To enable this feature:
- Go to Extensions > Modules >SimpleGreat Blog Manager (click Edit button at the right).
- Click "Blog Latest" icon:

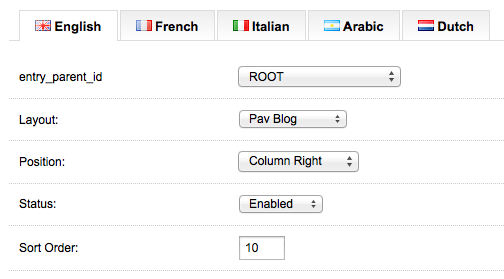
- Click "Add module" at the left.
- Create module with settings as you see on image:
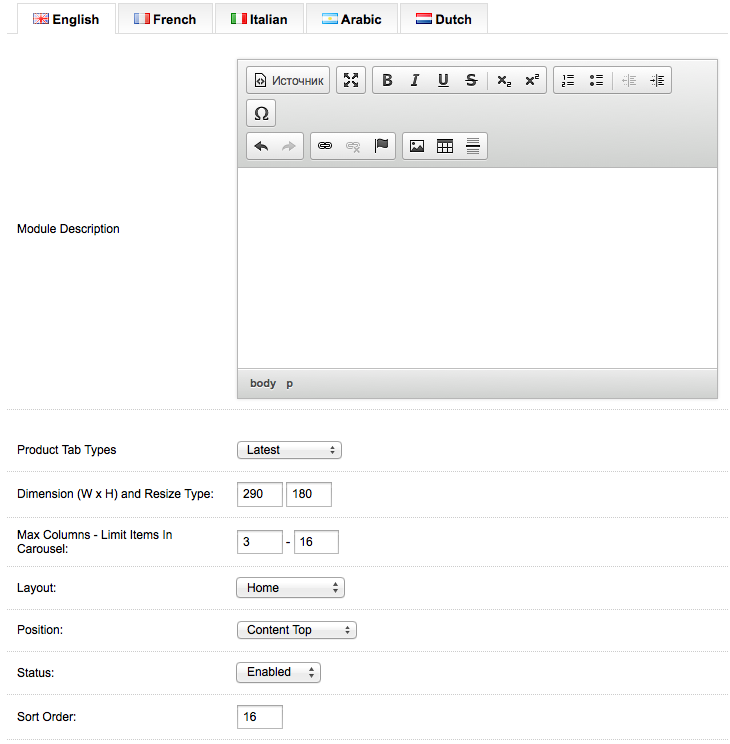
- This step is IMPORTANT if you want to display blog posts in News Slider in HomePage about block!
You must add this module with this settings.
- Click Save button.
You can display latest blog posts in News Slider on homepage automatically:
To enable this feature:
- Go to Extensions > Modules >SimpleGreat Theme Administration (click Edit button at the right).
- Enable "Show Blog posts in About Block Blog slider" option in theme admin panel:

- If you Enabled this feature your homepage Latest Blog Posts module will be moved to News Slider and will work as slider.
- Click Save theme settings button.
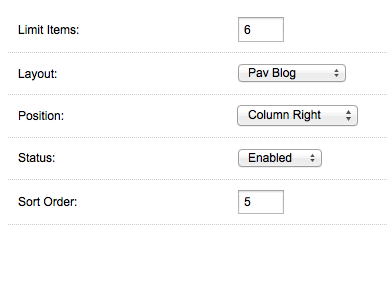
You can display latest blog posts at the Right theme Sidebar. We recommend to add this module to Pav Blog page.
To enable this feature:
- Go to Extensions > Modules >SimpleGreat Blog Manager (click Edit button at the right).
- Click "Blog Latest" icon:
- Click "Add module" at the left.
- Create module with settings as you see on image:
- Click Save button.
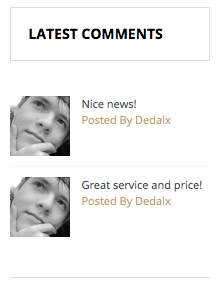
Latest Blog Comments module
You can show latest blog comments at the left or right theme sidebar:
We recommend to add this module to Pav Blog page.
To enable this feature:
- Go to Extensions > Modules >SimpleGreat Blog Manager (click Edit button at the right).
- Click "Blog Comment" icon:
- Click "Add module" at the left.
- Create module with settings as you see on image:
- Click Save button.
Blog Categories module
You can show blog categories menu at the left or right theme sidebar:
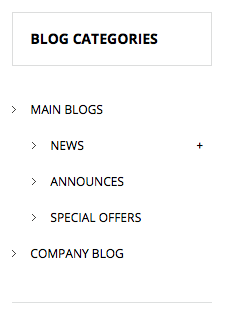
We recommend to add this module to Pav Blog page.
To enable this feature:
- Go to Extensions > Modules >SimpleGreat Blog Manager (click Edit button at the right).
- Click "Blog Comment" icon:
- Click "Add module" at the left.
- Create module with settings as you see on image:
- Click Save button.
G) Twitter setup - top
New Twitter API 1.1 requires authefication for your application/website, and you need to create new Twitter app in Twitter API for this:
- Go to http://dev.twitter.com/ and login with your Twitter user
- Go to your applications (https://dev.twitter.com/apps) and click Create a new application button
- Fill your website details in form:
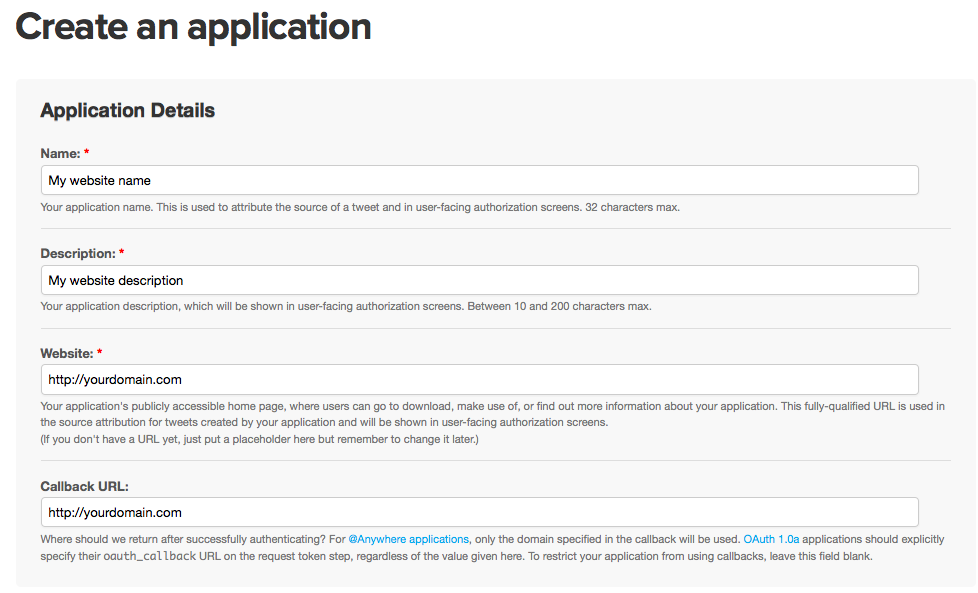
- You will see your app details page.
- Click "Create my access token" button at the bottom of page.
- Open theme file catalog/theme/simplegreat/js/twitter/index.php in any text/code editor and fill in this details with data from your app page in Twitter website:
- // Your Twitter App Consumer Key
private $consumer_key = 'YOUR_CONSUMER_KEY'; - // Your Twitter App Consumer Secret
private $consumer_secret = 'YOUR_CONSUMER_SECRET'; - // Your Twitter App Access Token
private $user_token = 'YOUR_ACCESS_TOKEN'; - // Your Twitter App Access Token Secret
private $user_secret = 'YOUR_ACCESS_TOKEN_SECRET';
- // Your Twitter App Consumer Key
- Upload changed file to FTP.
- Now you can put your twitter username in Theme Admin panel and see Twitter feeds on your site.
H) Theme administration panel usage - top
- In your Open Cart admin go to Extensions > Modules and click Edit near to "Simplegreat Theme Administration" moduie. You will open theme control panel.
- Use left tabs to access all theme features settings and setup what you want.
- Dont forget to click "Save settings theme settings" to apply your changes!
I) Project structure - top
- UPLOAD - directory with theme files and theme admin panel module
- PSD - PSD theme files
- Documentation - this file
- Slider Documentation - Revolution slider documentation
J) Contacts and support - top
Once again, thank you so much for purchasing this item. As I said at the beginning, I'd be glad to help you if you have any questions relating to this theme. No guarantees, but I'll do my best to assist.
Please, dont forget to leave stars rating for my app on ThemeForest. You can do this in Downloads section in your profile.
DedalX