THANK YOU FOR PURCHASE!
You just purchased one of our best WordPress themes and we hope that you will enjoy with this purchase!
To help us with theme FREE for you updates with new cool staff and new features please take 1 minute to leave stars rating for this theme on ThemeForest:
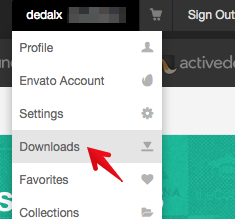
- Go to Themeforest, login and navigate to your account
- Click Downloads link and you will see your
purchases list:
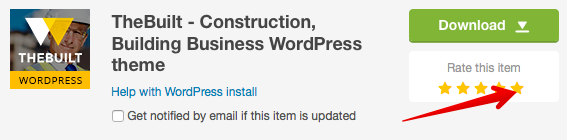
- Click stars around our theme to leave stars
rating:
-
If you like our theme can you please kindly leave positive 5 stars rating review for our theme on Themeforest? ( check how to do this http://magniumthemes.com/how-to-rate-items-on-themeforest/ ). This is very important for us!
Please do not leave negative review if you have any problems, just let us know and I will help you to fix this.
How to install wordpress in 5 minutes - NEWBIE GUIDE
If you newbie with WordPress, domains and hostings we recommend you to read our ultimate newbie guide "How to start your blog in 5 minutes with WordPress".

For many, when they think of WordPress, they think blog. And while WordPress is one of the worlds largest blogging platforms, WordPress is also a complete content management system and is a great way to build many different types of websites. This article will show you how easy it can be to get your blog, or website, up and running quickly.
FREE THEME INSTALLATION SERVICE
You can get FREE WordPress and Theme Installation service for this theme, check here how to apply.
THEME CUSTOMIZATION SERVICES
If you want to have additional theme features that theme does not have by default or want to change theme styles you can always order our theme customization services, check services and prices here.
Installation
Unzip the file that you download after purchase. The following files and folders will be in the unzipped file:
- thebuilt.zip (Packed theme file for install)
- thebuilt folder - theme for manual FTP upload
- Documentation/index.html (This file)
- Documentation/release-history.html - Update instructions for theme updates
The theme can be uploaded in two ways:
- FTP upload: Using your FTP program, upload the non-zipped thebuilt folder into the /wp-content/themes/ folder on your server.
- WordPress upload: Navigate to Appearance > Install Themes > Upload. Go to browse, and select the zipped thebuilt.zip file. Hit Install Now and the theme will be uploaded and installed.
Once the theme is uploaded, you need to activate it. Go to Appearance > Themes and activate TheBuilt theme.
Check that cache subdirectory in theme folder available for server writing (chmod 0777 or other permissions rules for write on your server).
If you need help installing Wordpress see the link here : http://codex.wordpress.org/Installing_WordPress
After the install finish, go to TheBuilt Control Panel page, then click Save button import default settings values to database. You don't need to do this if you use 1-Click Demo import feature.
PLUGINS INSTALLATION
After you Activate this theme you will see message in WP admin panel that you must install required plugins and can install recommended plugins. Don't worry - all plugins included with theme and you don't need to download or purchase something.

- Click Begin installing plugins in this message
- You must check all required plugins and can
check recommended plugins (we recommend it to use,
but theme will work without this plugins too):
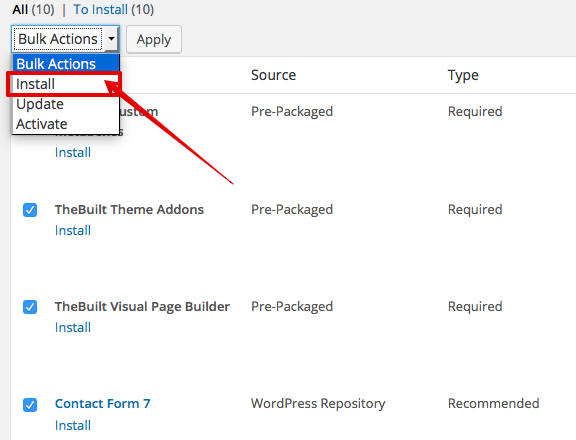
- Select Install in dropdown Bulk Actions menu and click Apply
- You should get All installations have been completed message with installed Plugins table below it
TheBuilt theme has included 1-click demo data import feature. This sample data contains menus, sample pages, posts and images. Your site will looks exactly as our demo site if you import sample demo data. We are strongly recommend you to import Dummy Data first time when you use our theme first time.
ONE CLICK DEMO DATA IMPORT:
You can import all theme demo content with one click (posts, pages, products, categories, menus, sample images, sliders, plugins configurations).
- Go to Appearance > Import Demo Data
- Click Import Demo Data button and wait until import process will be finished
Check
this article how to solve demo data import problems.
Please note that theme data does not have real images
from our demo, all demo images will be replaced with sample solid
blue color background images (you don't have legal rights to use
real images, because you don't purchased it). You need to change
demo images to your own real images.
REVOLUTION SLIDER
Revolution slider is very powerful slider with different animations, effects and more, you can read about this slider on its official website.
Please note: We do not develop Revolution slider and don't provide any support about usage, setup or configuration of this slider plugin. You can get Slider support at ThemePunch support website.
This theme include a lot of different demo sliders used on different demo homepages. All sliders automatically import within 1-Click Demo data import. Demo sliders does not have real images from demo website (you will have solid background).
Logo SETUP
To add your logo to theme follow steps below.
- Go to Appearance > Header or Appearance > Customize.
- If you want to show Retina logo (high resolution logo for retina devices like iPhone, iPad, MacBook Retina, etc) you need to prepare your logo 2x size larger that original. For example if you want to see logo with 200px width on your site you should make your logo 400px width.
- Click Add new image and Select your
logo image and click Save.
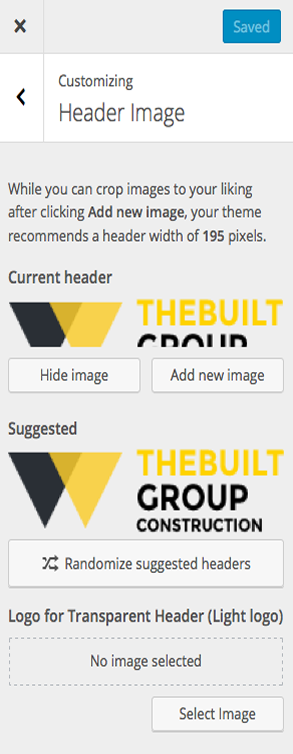
- Upload light version of your logo (white) as "Logo for Transparent Header", it will be used with transparent header. Image should be the same size and dimensions as your regular logo.
- You can crop logo image if you want.
- To Enable retina support (if you uploaded
retina size logo) go to TheBuilt ThemeControl Panel > Header
and input your regular logo size option:

If you have big logo you can adjust Header height value too. - Click Save Settings.
Page Builder CONFIGURATION AND Overview
WordPress has evolved into a fully functional CMS. Page Builder completes the transition by giving you a way to create responsive column layouts using the widgets you know and love.
This themes comes with Visual Page Builder with a lot of page builder items and our special MGT items created especialy for this theme, you will have the flexible to display your content to the page.
Our Visual Page Builder allow you to edit pages directly on frontend!
All demo site pages was created in Page Builder provided with theme.
Please refer to page builder video tutorials and import sample data to understand how it works.
Visual page builder have a lot of features, we recommend you to
read full Page
Builder Documentation guide here.
PAGE builder CONFIGURATION:
- Go to Visual Composer > Role Manager
- Check selected Post types as you see on
image below for your administrator and other
user rules where you will use page builder:
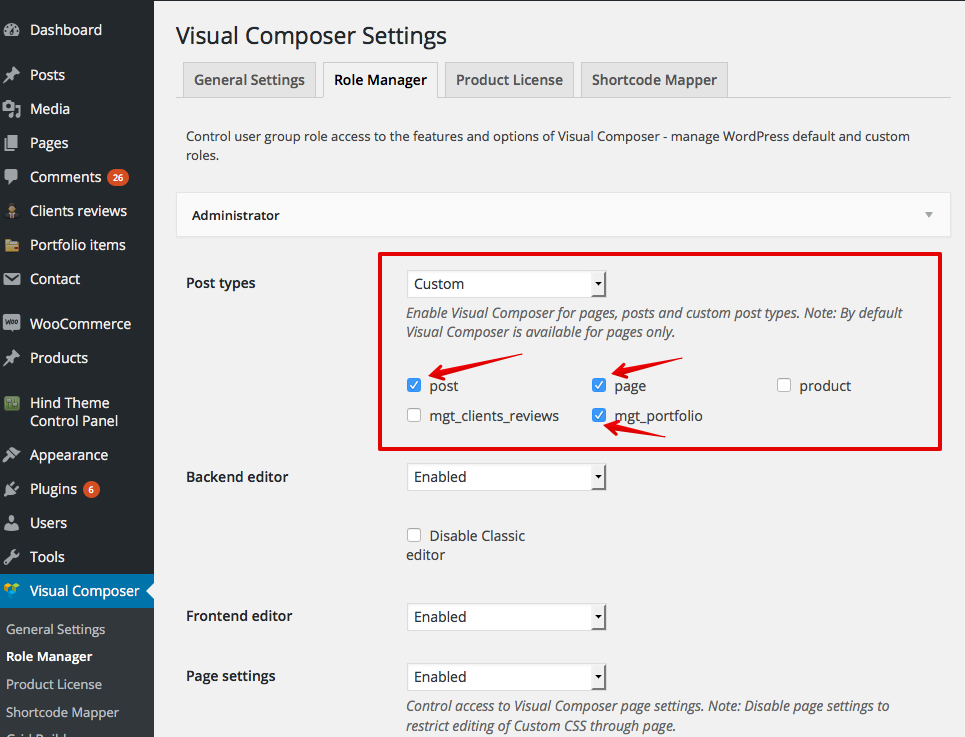
- Click Save changes
USING PAGE builder:
- Add/Edit page, product, portfolio element or post
IMPORTANT: If you use Gutenberg editor and does not want to disable it (you can disable it with this official plugin for WordPress 5 and later) you need to click Pages > All pages, and then Add new > Classic editor or edit page with Classic editor link near page name in list, otherwise Gutenberg editor will replace WPBakery Page builder. - Click Backend editor button near to content
area to switch editor to Page Builder
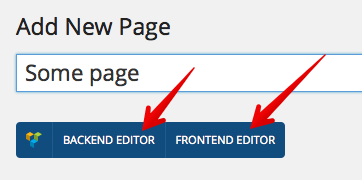
or click Frontend editor to edit your page directly on your frontend!
- To add some new Page Builder element click + Add
Element button

- Select element that you want to add and
select its options
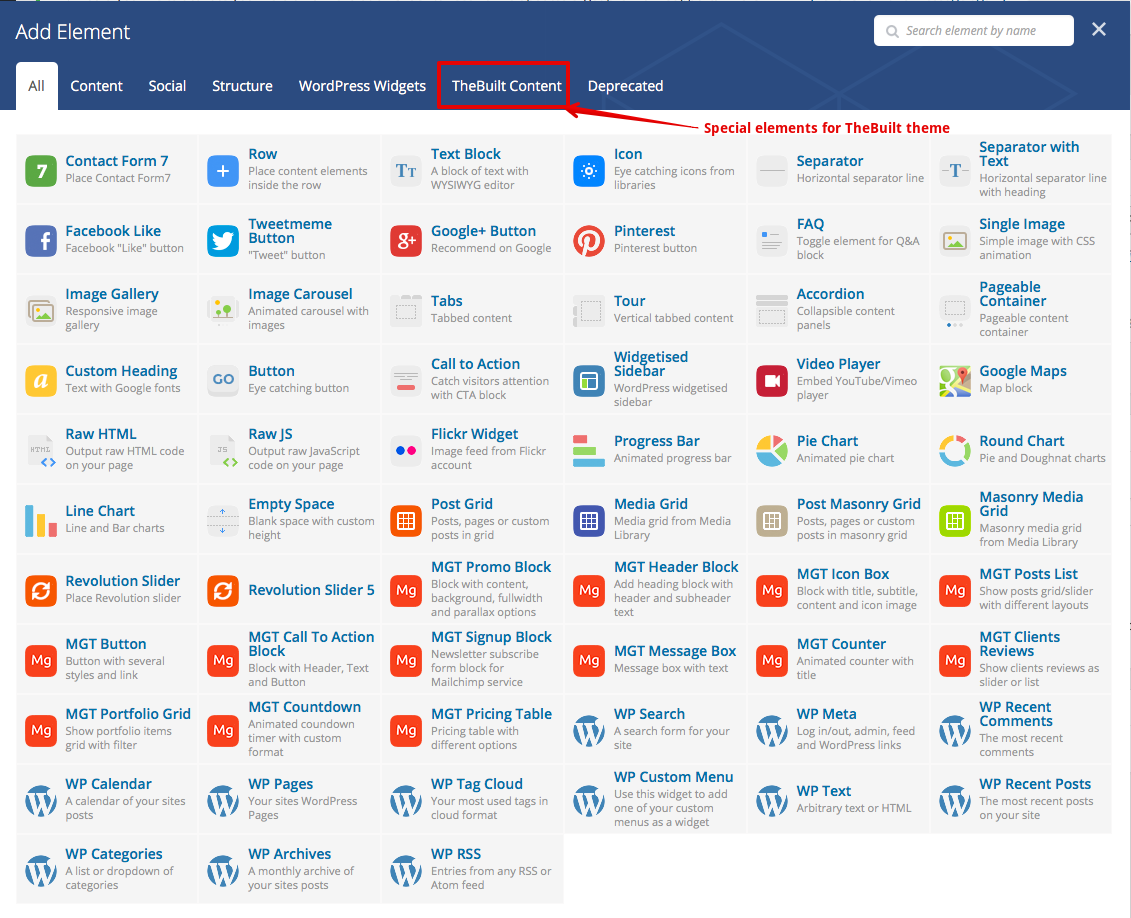
You can read about special theme elements in current documentation. - You will see that element was added to your visual content editor. You can move, edit or delete them.
- Visual page builder have a lot of features, we recommend you to read full Page Builder Documentation guide here.
- For any questions about Page Builder you can use WP
Bakery support forums.
We don't develop Page Builder plugin and does not provide any support about it usage.
HOMEPAGE SETUP
You don't need to create Homepage and Blog pages if you used 1-Click Demo Data import feature or imported theme demo content manualy.
First of all you need to create required pages and select it for frontpage display:
- Go to Pages > Add New
- Input some page name, for example Home (we will fill it some steps later)
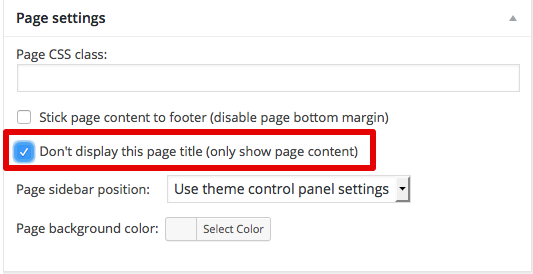
- Check Don't display this page title option,
because we don't need to see Homepage title.
- Publish homepage page
- Go to Pages > Add New
- Input some page name for blog, for example Blog and Publish it
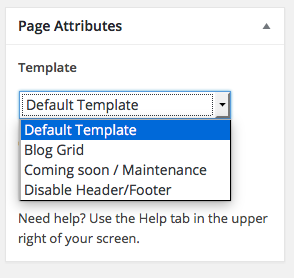
- You can change layout of blog Page from default to Blog
Grid by selecting Page Template
when you create blog page:
- Go to Settings > Reading
- Choose Front page displays option "A
static page", select Home page that
you just created for Front page option and Blog
page for Posts page option:
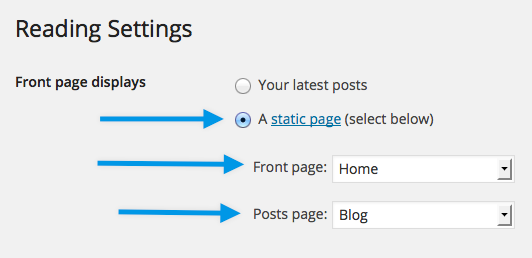
- Click Save settings
Now you can create content of your HomePage. You can skip this step and read next documentation section "menu management" if you imported sample data, because you already will have demo homepage as on our demo site.
You can add different blocks for homepage with our predefined styles to made your homepage looks similar to our demo site or create homepage as you want in our Visual Page Builder (all content on our demo site created with it).
CREATING YOUR HOMEPAGE CONTENT
We strongly recommend you to import demo content first time when you use our theme to check all theme features and all Page Builder elements and understand how it works.
If you don't imported demo data you will need to add Page Builder elements to your homepage yourself. You can use Page Builder elements and our special theme Page Builder elements (Magnium groups in Page Builder elements groups).
You can read about our special elements in current documentation
here. You can read about Default Page
builder elements usage in Page
Builder documentation here.
pages MANAGEMENT
- Go to Pages > Add new.
- Input some page title. Page title will be show on Onepage template before page content.
- Add page content using Visual Page Builder
- You can Input page class if you want to add some CSS styles only for this page.
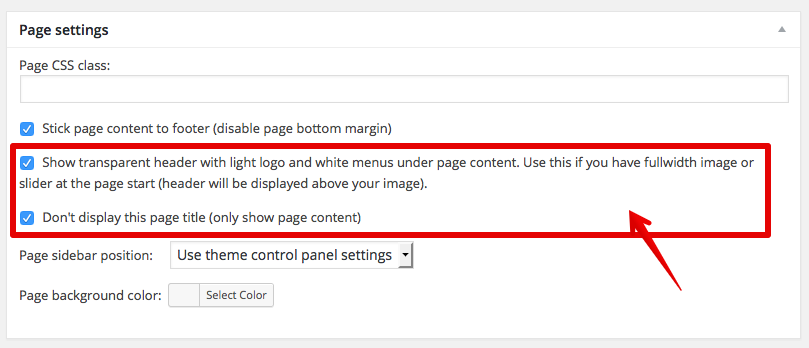
- Change page settings:
- - Enable if you want to have last page element sticked to footer without margins.
- Show transparent header - Use this if you have fullwidth image or slider at the page start (header will be displayed above your image).
- Page sidebar position - you can specify widgets sidebar position for this current page (every page can have different settings here).
- Don't display this page title (only show page content) - disable title display on page
- Page title background image and color - you can specify page title background image and color here.
- Publish page.
- Go to Appearance > Menus and add created
page to menu.
BLOG MANAGEMENT
You created blog page before (in Installation step) and added it to your post display page in Reading settings.
If you added Blog page to menu it will displayed in site menu and will open blog page with posts.
You can manage blog posts and categories as in any WordPress theme. You can use post thumbnails too.
Our theme support different post formats:
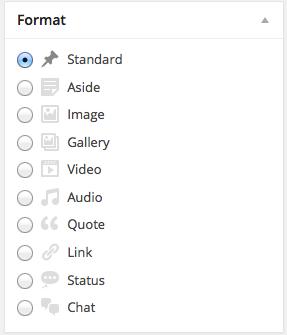
You can select post format when you create post.
You can select different sidebar position for posts in Post settings.
COMING SOON PAGE SETUP
Our theme have built in Coming soon/Maintenance mode feature, that allow you temporaly disable website frontend for regular visitors (they will see your custom Coming soon page), but allow website administrators to see site and work on it. You can see coming soon page demo here.
You need to create special page (if you imported demo data you already have this page) that you want to show to your users when your website is turned off:
- Go to Pages > Add New and create new page Coming soon (you can use any name).
- Add some page content using Visual Page Builder that you want to show to your users (Countdown timer page builder element is very useful here).
- Select Coming Soon in Page
Templates in Page Attributes:
Note: You should have only one page with Coming Soon Template selected. - Publish your page.
- To Enable coming soon mode go to Appearance > Theme Control Panel > Main Settings and check Enable Coming Soon mode. Now your regular users will see your page. Don't forget to disable this option when you will go live.
MENU MANAGEMENT
This theme have top menu, main menu, footer menu and offcanvase
wigets sidebar that can be used as additional menu. Main menu can
have different layouts and support MegaMenu features.
1. Top menu:

2. Main menu (several variations depending on
theme settings). You can change MainMenu settings in Appearance
> Theme Control Panel > Header.
2.1. MainMenu position = Menu Below Header

2.2. MainMenu position = Menu in Header Center

2.3. MainMenu position = Menu in Header Center, Show top menu
above MainMenu in header = Yes

3. Footer menu:

4. Offcanvas sidebar menu:
You need to set what menus where will be display (you don't need to do this if you used One-Click demo data import feature):
- Go to Appearance > Menus.
- Open Manage Locations tab.
- Select menu "Main Menu" for Main menu, "Top
Menu" for Top Menu and "Footer Menu"
for Footer Menu.
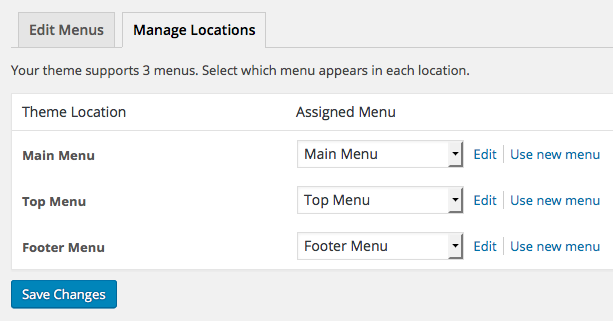
If you don't have some menus you need to create it first and add your elements. - Save changes.
Managing WOOCOMMERCE categories menu
- Add WooCommerce categories to you Categories
menu, add some page links to it if you want (for example Contact
us page or blog page)
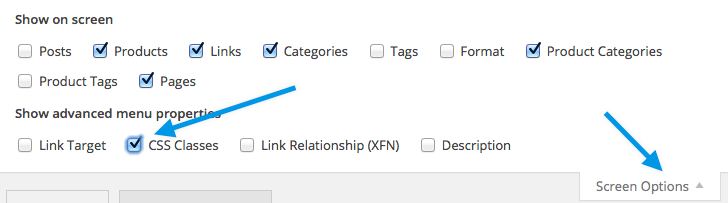
If you don't see WooCommerce categories elements to add it to menu you should enable it in Screen Options at the top of page:

- Click Save Menu
SPECIAL CSS CLASS NAMES FOR MENU ITEMS
You can use special predefined CSS class names for main manu
items to change its look.
You can use this special CSS classes:
- pull-right - use this to move your element to right side of main menu.
- mgt-animated - use this to add hover animation for menu element.
- mgt-highlight - use this to add theme color background to this menu element.
To add CSS class to menu item:
- Go to Appearance >Menus.
- Click Screen options at the top right
corner of page and enable CSS Classes field display:
- Add predefined CSS class(es) space separated
to your menu item:
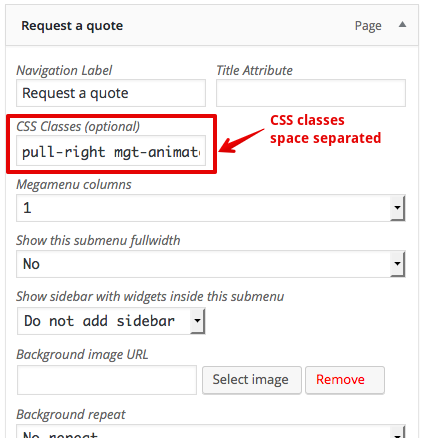
- Save menu.
Offcanvas menu
Our theme have special right side offcanvas menu that
you can open by clicking small menu button in header:
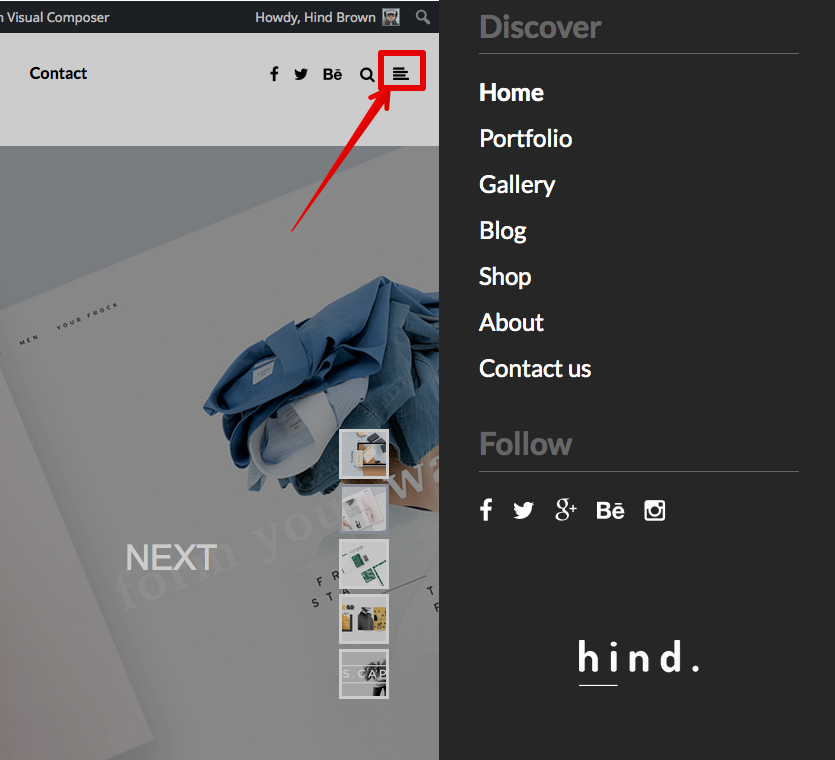
This is special sidebar where you can add any menus, widgets or
any other content in additional to your regular menus.
HOW TO USE OFFCANVAS MENU
- Go to Appearance > Widgets and add
Widgets to Offcanvas Right Sidebar:

- Go to Appearance > Theme Control Panel > Header and enable Enable right side offcanvas floating sidebar menu option.
- Save settings.
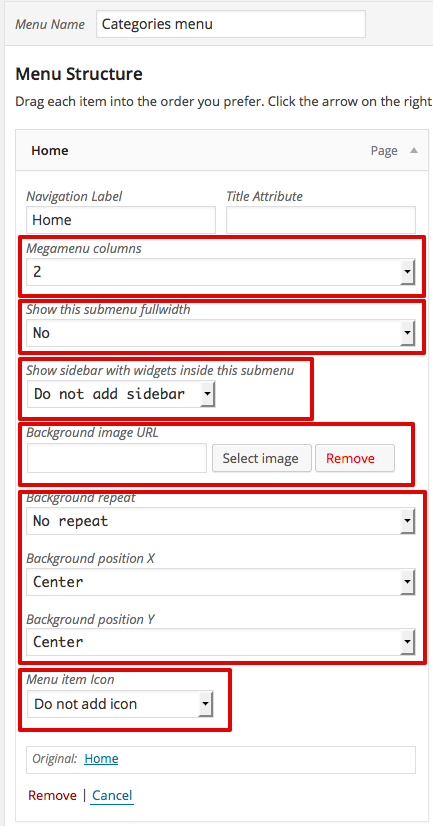
MEGA MENU management
We developed our own Mega Menu functionality especially for this theme.
This is awesome responsive meage menu. Features: icons, sticky, mega dropdowns variations, fully customizable. You can place any content in dropdowns: links, text, images, widgets and shortcodes.
You need to activate MegaMenu features in Appearance > Theme Control Panel > MegaMenu > Enable Mega Menu.
Now you can go to Appearance > Menus and use Mega Menu features in your regular menu items:
If you imported demo data you can setup Mega Menu Layouts for demo data menu items, because it does not have this settings by default after import.
You can create more sidebars for Mega Menu in Appearance > Theme Control Panel > Mega Menu.
WIDGETS MANAGEMENT
This theme have 6 widgets sidebars and unlimited megamenu sidebars where you can add widgets:
- Posts sidebar (Right or Left)
- Pages sidebar (Right or Left)
- Portfolio page sidebar (Right or Left)
- Footer sidebar #1 with 4 columns
- Footer sidebar #2 with 4 columns
- Offcanvas right sidebar (can be opened with header switcher button)
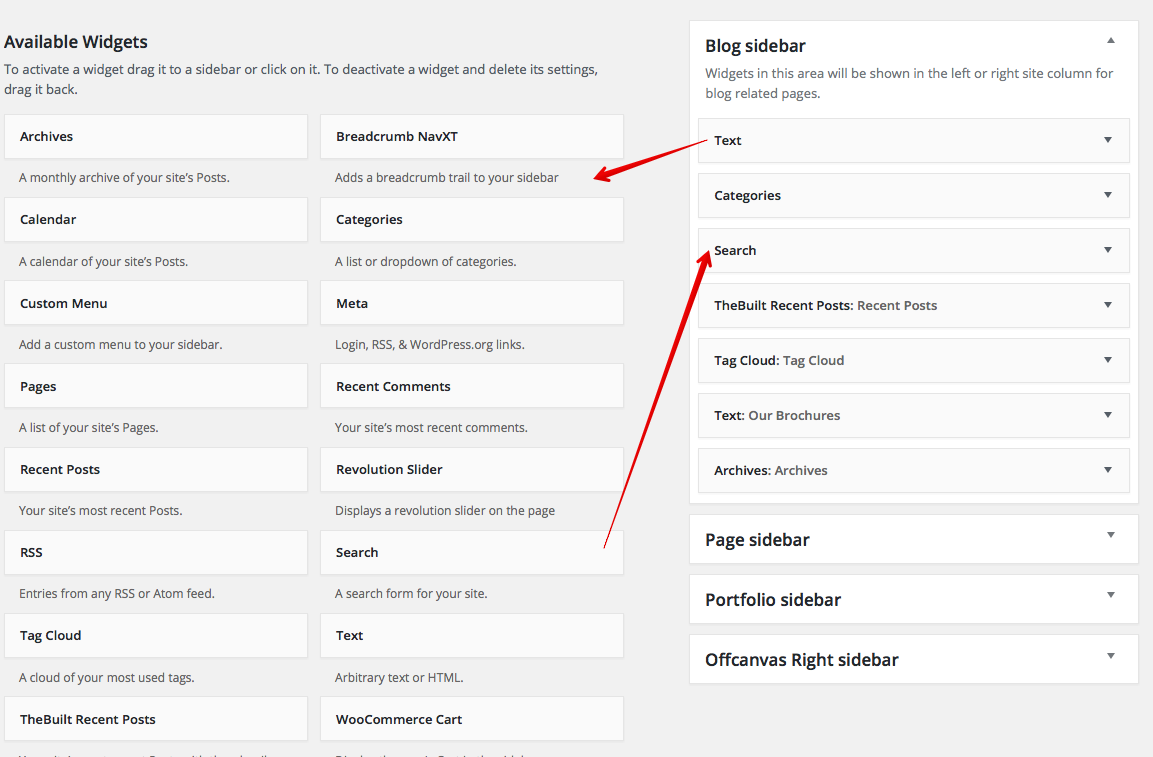
After theme installation all WordPress widgets will be enabled (if you have WP fresh installation) so you need to turn off widgets that you don't want to see:
- Go to Appearance > Widgets.
- Move widgets from left "Available Widgets" block to right sidebar that you want to use to add it to display in theme.
- Move widgets from right sidebars block to
left "Available Widgets" block to remove
it from display in theme.
Special theme widgets
Our theme have special widgets that you can use in additional to default WordPress widgets.
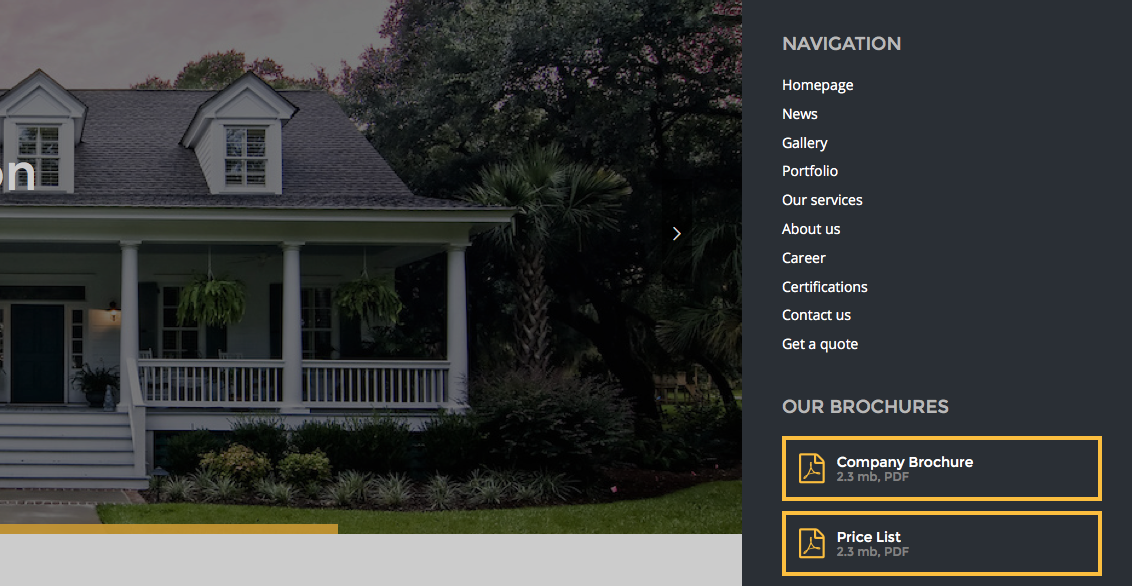
Files list (brochures) widget:
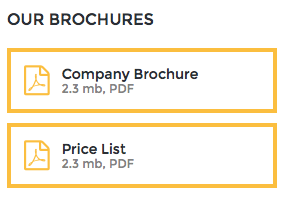
To use this widget add default WordPress Text Widget to your sidebar and use this predefined HTML layout:
<div class="widget-download-icon"><i class="fa fa-file-pdf-o"></i>
</div>
<div class="widget-download-details">
<div class="widget-download-title"><a href="#">Company Brochure</a></div>
<div class="widget-download-subtitle">2.3 mb, PDF</div>
</div>
</div>
<div class="widget-download-link-wrapper">
<div class="widget-download-icon"><i class="fa fa-file-pdf-o"></i>
</div>
<div class="widget-download-details">
<div class="widget-download-title"><a href="#">Price List</a></div>
<div class="widget-download-subtitle">2.3 mb, PDF</div>
</div>
</div>
Change # to your real links, change texts and icons (instead of fa-file-pdf-o you can use another icons codes fromFont Awesome website). You can copy this code to add more different files links to your widget and you can use this HTML code on your site pages too (use Raw HTML element in Visual Composer to add custom HTML to pages content).
Promo Blocks widget:
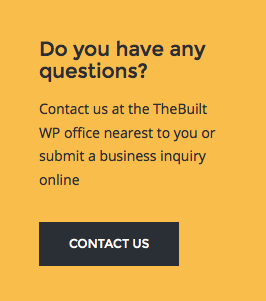
You can use some elements that you used in Visual Page Builder in page content in your widgets, for example MGT Promo Block.
To use this widget add default WordPress Text Widget to your sidebar and add your Promo Block HTML code to it. To get Promo Block element HTML code first create some sample Page and add MGT Promo Block using Visual Composer. Adjust block settings as you want. Then change Page editor mode to Classic view (this will disable Page Builder) and switch content editor to Text mode. You will see Promo Block HTML code, copy it and paste to your text widget.
Menu widget:
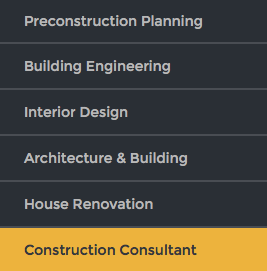
You can add nicely styled custom menus to widget sidebars. For example you can use this menu to show it on your services pages to have access to all other services list.
To use this widget create new menu in Appearance >
Menus and add your pages links (or other links that
you need) to this menu. Then go to Appearance >
Widgets and add add Custom Menu
widget to your sidebar (for example Page sidebar):
TheBuilt Recent posts widget:

You can use special theme widget to show recent posts with
images. Use "TheBuilt Recent posts" widget to achive this.
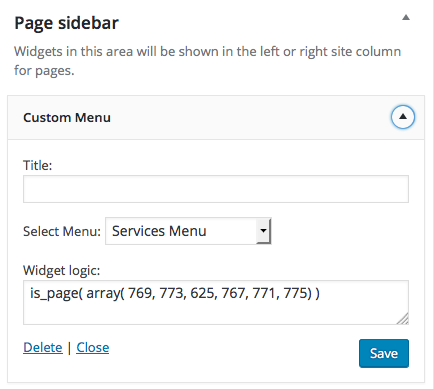
USING WIDGET LOGIC To show widgets on specific pages only
Our theme include special Widget Logic plugin that allow you to specify pages where your widgets will be visible or not. If you want to use this feature this plugin must be installed and activated.
To use this feature:
- Add some widget to one of your sidebars.
- You will see "Widget logic" text field in your widget. You can use WordPress logic conditions and PHP code here to determine logics when this widget should be visible:
Usually you just need to use is_page() condition
- this allow you to specify pages ID or pages names where this
widget will be visible (all OTHER pages will not display this
widget). We used this to show Services menu only on services
pages.
Examples of usage:
is_page( array( 769, 773, 625, 767, 771, 775 ) )
This condition means that widget will be visible only on pages with ID's - 769, 773, 626, 767, 771, 775.
is_page( array( "Design", "Interior", "Gardening" ) )
This condition means that widget will be visible only on pages with titles "Design", "Interior" and "Gardening".
Be careful when you use your conditions, if you add something incorrectly you will get fatal PHP errors on your site (in this case restore our sample code in widget and try again).
You can check advanced list for all WordPress available condition
logic functions here:
http://codex.wordpress.org/Conditional_Tags
Also you can check Widget Login plugin guide:
THEME Settings
You can manage multiple theme settings in our Theme Control Panel module.

- Go to Appearance > Theme Control Panel from left menu in WP admin panel.
- Click Save button first time to apply default theme settings to theme.
- You can manage a lot of theme options from this panel, check all available Tabs with settings.
- If you want to reset settings to default values you can click Reset button at the top right.
- If you want to Preview site after some changes you can use Toggle Preview button to display/hide your site frontend without leaving admin panel.
- After you made any changes you should click Save button to save theme settings.
- You can Export all saved settings to file, use Export tab for this feature.
- You can Import your saved settings file or data in Import tab.
Headers layouts configuration
Our theme allow you to use different Header settings to achive different header layouts (menu positions, colors, promo texts and banners, etc). You can create unlimited headers variations using different settings located at Appearance > Theme Control Panel > Header. We prepared several demo headers for you and provide settings that we used to achive this look below:
Demo Header style 1

Settings used in Theme Control Panel > Header:
- Main Menu Position = MainMenu below Header
- Show top menu above MainMenu in header = No
- MainMenu Below Header Width = Fullwidth
- MainMenu color scheme = Dark menu
- MainMenu horizontal align = Left
- MainMenu items text transform = Uppercase
- Header Logo position = Left
- Enable Fullscreen search (Add search button to header) = Yes
- Enable right side offcanvas floating sidebar menu = Yes
Demo Header style 2

Settings used in Theme Control Panel > Header:
- Main Menu Position = MainMenu in Header Center
- Show top menu above MainMenu in header = Yes
- MainMenu items text transform = Uppercase
- Enable Fullscreen search (Add search button to header) = Yes
- Enable right side offcanvas floating sidebar menu = Yes
Demo Header style 3

Settings used in Theme Control Panel > Header:
- Main Menu Position = MainMenu below Header
- Show top menu above MainMenu in header = No
- MainMenu Below Header Width = Fullwidth
- MainMenu color scheme = Light menu
- MainMenu horizontal align = Center
- MainMenu items text transform = Uppercase
- Header Logo position = Center
- Enable Fullscreen search (Add search button to header) = No
- Enable right side offcanvas floating sidebar menu = No
TRANSPARENT HEADER CONFIGURATION
Our theme allow you to use transparent header on any page, post or portfolio element separately. This mean that all header (logo, menus, etc) will be displayed above your top page content with transparent background. This is very useful for pages where you have fullwidth Revolution slider or fullwidth Image/Block at the page top and you disabled page title.
You can check live demo for this feature here.
![]()
USING TRANSPARENT HEADER
- First of all upload your light (white) logo version for transparent header according logo upload instructions from this guide.
- Open your Page/Post/Portfolio page when you want to show transparent header (for example your homepage).
- Make sure that your page starting from fullwidth row with
fullwidth slider, fullwidth image or fullwidth block with image
(so your transparent header will look nice on this page top).
Read this documentaiton section how to use fullwidth rows in Page Builder. - Disable page title for this page and check Show
transparent header option for your page::
- Save your page, post or portfolio element.
- You can use transparent header with or without Sticky
Header feature that you can enable/disable in Appearance
> Theme Control Panel > Header.
ONEPAGE USAGE
Our theme allow you to have Onepage website instead of multipage. This mean that all your main content will be displayed on the same one Homepage and menu links will scroll your page to different sections of your homepage content. This allow your visitors to see all your website on the same page and easy and fast navigate between site sections without leaving your homepage and without page refresh/reloading.
You can check onepage site demo here.
CREATE ONEPAGE MENU ITEMS
Before starting to add your onepage content you need to create menu items that will work as links for your onepage sections:
- MegaMenu feature should be enabled in Appearance > Theme Control Panel > Mega Menu.
- Go to Appearance > Menus and add menu
item Link:
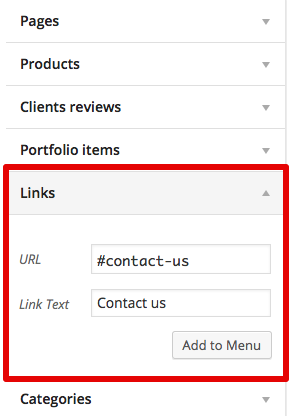
- You need to add your item slug to
URL field with # symbol at start (this is
important!), you can specify anything here, but you
should use only english latters here and - or _ symbols. Do not
use space symbol here or another languages letters or
specsymbols.
For example for Contact Us page slug in our sample all of this will be correct and can be used as URL:- #contact-us
- #contactus
- #contacts
- #contact_us
- Add link title to Link Text (this link name will be visible in menu).
- Click Add to Menu.
- Find this created item in menu and open its Settings:
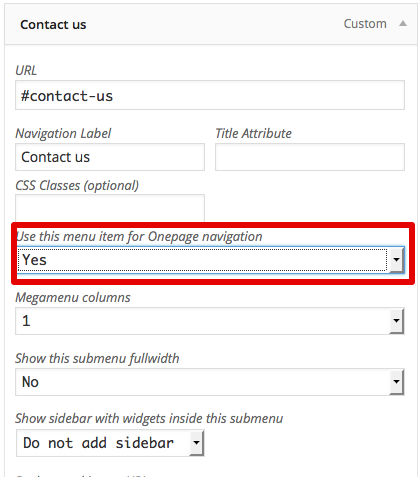
- Select YES for Use this menu item for Onepage navigation option.
- Now you can add section for your homepage that will use this menu item.
CREATE ONEPAGE HOMEPAGE
- Edit or Create your Homepage page
- Using Page Builder add content to your page
that you need to see on your homepage. You should create all
content sections on the same page.
For example your Onepage homepage can contain this logical sections:- Slider
- Welcome/About us text
- Portfolio grid
- Newsletter signup block
- Blog posts (News)
- Contact us form
- Google map (Find us)
- In our example we added Contact us link before and want to point it to Contact us form on our Onepage Homepage.
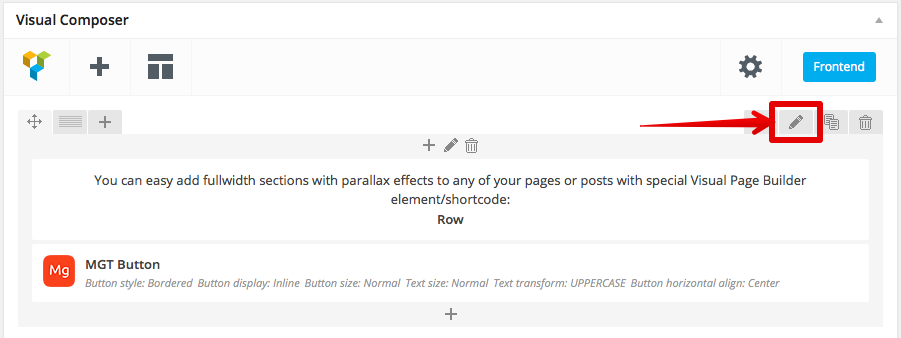
- In your Onepage page in Visual Page Builder editor
find Row that contain your Contact us form and Open
this Row settings:
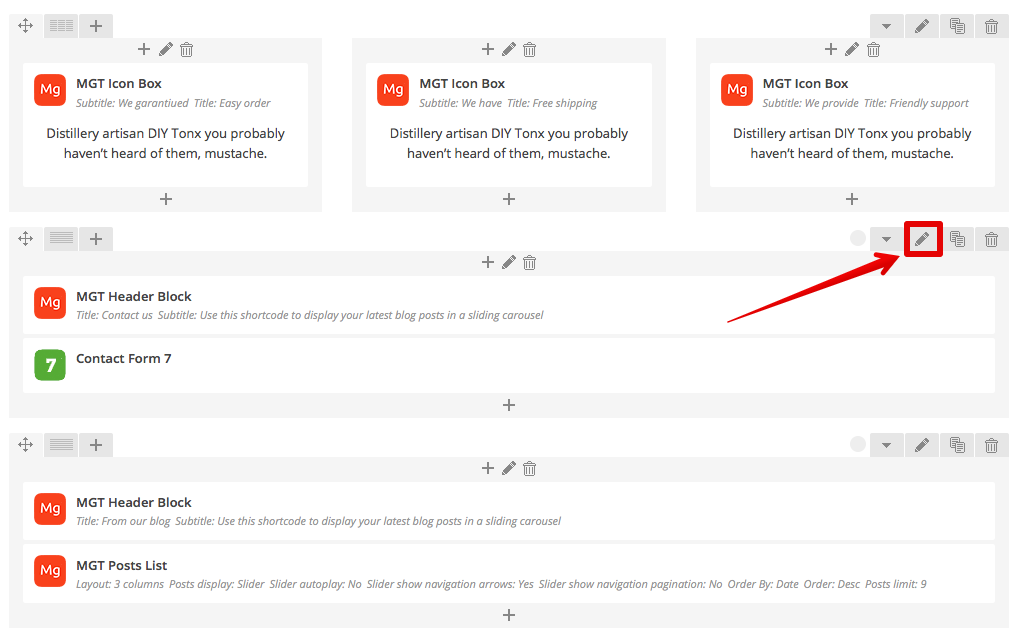
- In Row settings select your menu link in Use
as Onepage section dropdown list that should be used
for this section on Onepage page navigation:

- Publish your page.
- Now when you click your Contact us link in menu your homepage will be scrolled to your Contact us section.
- In the same way you need to create links and sections
for all your Onepage logical sections. You can
combine regular links (that open pages) and OnePage links (that
scroll down homepage to section) in the same menu and have
Onepage+Multipage website together on one site.
PORTFOLIO USAGE
In our theme you can choose between 14 portfolio grid layout variations, fullwidth or boxed layouts, spaced or regular grid, 8 portfolio item hover animations, 18 category filter animations, 3 column count settings and more!
All this settings can be combined with each other that gives you unlimited design variations of your Portfolio page.
Our theme have built-in portfolio feature that allow you to add your works/projects on site and showcase it to your users.
CREATE PORTFOLIO PAGE
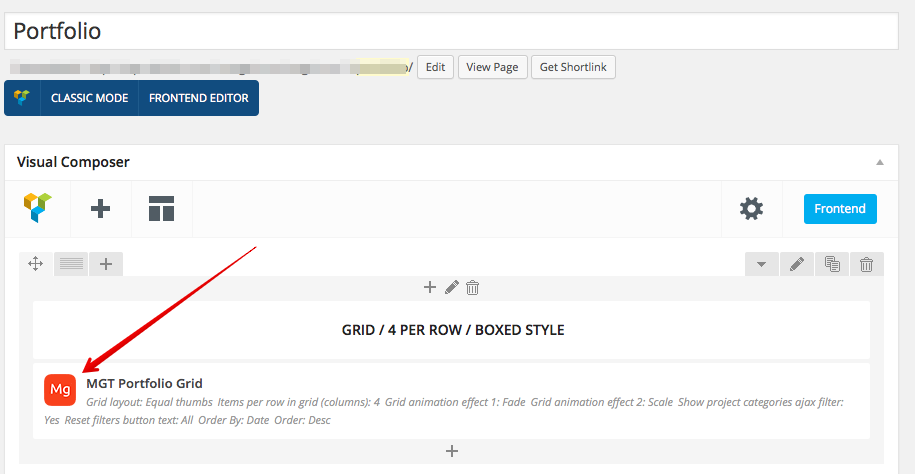
- Go to Pages > Add new and create Portfolio page (You can use any name for page).
- Using Page Builder add MGT Portfolio Grid element
to your page:
- If you want to show your Portfolio displayed Fullwidth you need to enable Fullwidth option in your Row settings.
- Publish your page.
You can select many different options and layouts for your portfolio grid display in element settings.
ADD PORTFOLIO ITEMS AND CATEGORIES
- Go to Portfolio items > Add new item.
- Add Portfolio Item name.
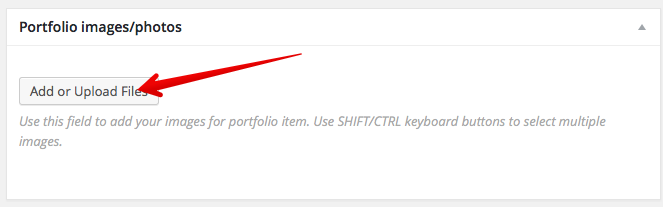
- Specify your Porfolio item thumbnail (it
will be used in Portfolio grid that you just created):

- Add Additional portfolio item images if you
want (you can use it as slider or as grid):
- Add your Porftolio element description using page builder (you can use any elements here) in Content editor area.
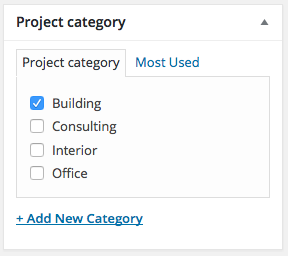
- Select/Create your Portfolio item categories:
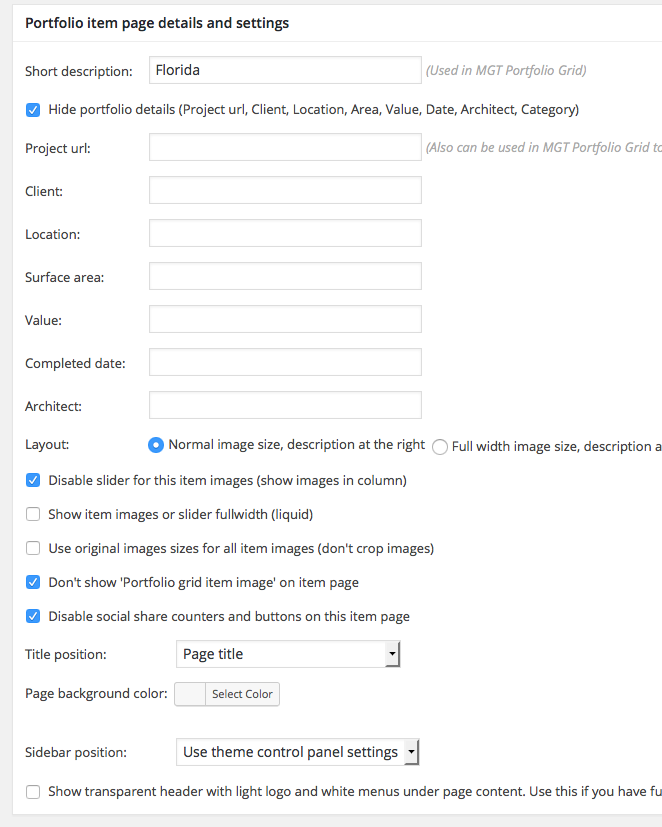
- Choose different Portfolio item layout/display
settings in Portfolio item settings
box:
- Publish your Portfolio element.
If you does not see this settings box this means you does not installed all theme required plugins (TheBuilt Theme Addons, TheBuilt Custom Meta Boxes (CMB2) plugins).
Short description field text will be visible in MGT Portfolio Grid as additional text after item title and category. It will not be visible on single portfolio element page.
PAGE BUILDER EXTRA ELEMENTS
Our theme included 13 special Page Builder elements that we developed especially for this theme (this elements does not available in Page Builder plugin in other themes).
You can use any default Page Builder elements with our theme too, about it usage you can read in official page builder documentation.
Fullwidth/Parallax Sections
Our theme allow you to create Page Builder rows with fullwidth display for background or content and add parallax image/video background to this rows. You can check live demo for this feature here.
You can add any content (for example any other Page Builder elements) inside this fullwidth rows and this elements will be displayed fullwidth too.
How to use this element
- Open your Page/Post/Portfolio item and turn on Backend/Frontend Visual Page builder editor.
- Add new Row or edit existing.
- Click Edit button for your Row
element to open its settings:
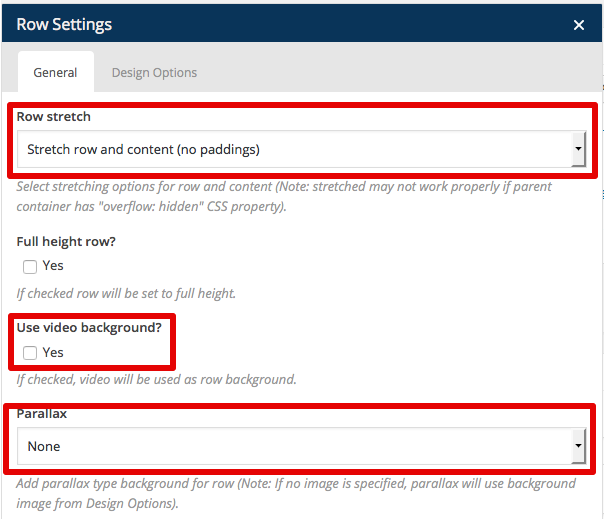
- You will see Settings window for row that
allow you to make your Row fullwidth:
 |
|
- Row stretch - Select how you want to stretch content/background in this row to make it fullwidth. You can stretch only background or background with content (with/without paddings).
- Use video background - You can add Youtube video as background to row with any content
- Parallax - You can add Parallax
background for current Row (we recommend you to use 1600px or
more width image for this).
- Save your page/post.
PARALLAX ELEMENTS ON SCROLLING
You can add parallax effects to different page elements on mouse scroll. This feature is experemental and may not work correctly for some blocks and can work differently in different browsers.
We recommend to use our theme demo page with this effect as start and change our images to your images, because you need to curefully adjust this effect settings and your images positions and sizes to get this effect working smoothly and without problems and elements overlays.
How to use this FEATURE
- Open your Page/Post/Portfolio item and turn on Backend/Frontend Visual Page builder editor.
- Add new Row or edit existing.
- Click Edit button for your Row
element to open its settings:
- Add parallax-it-row class name to Row
class that contain elements that should get parallax
effect on mouse scroll.
 |
|
- Save row settings.
- Add Images or Text blocks
to this row columns:

- Click Edit on your image or text:
- Add parallax-it-slow class name to Element
class.

- Save element.
You can use this class names for element to have different speed for parallax for different elements on page:
parallax-it-slow - Slow speed
parallax-it-medium - Medium speed
parallax-it-fast - Fast speed
- You need to adjust elements positions, speed classes, margins
and padding for rows/columns to get this effect working in nice
way.
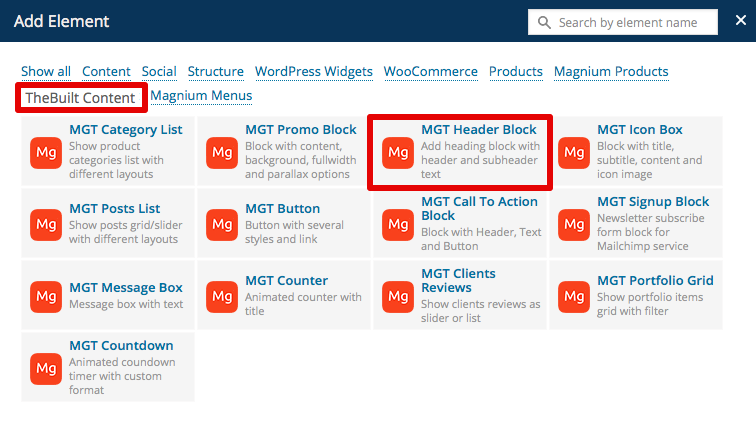
Header Block
You can add special preformated header blocks with title and
subtitle for your page.
You can check live demo for this feature here.
How to use this element
- Open your Page/Post/Portfolio item and turn on Backend/Frontend Visual Page builder editor.
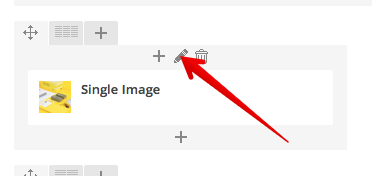
- Add new element by clicking + button
and choose MGT Header Block:
- Add Title, Subtitle and
select text Align for this block.
- Save your page/post.
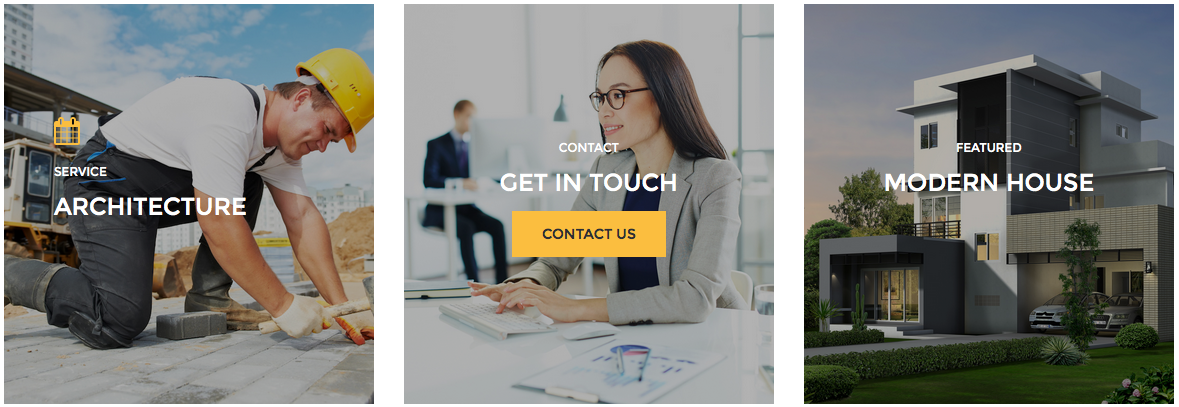
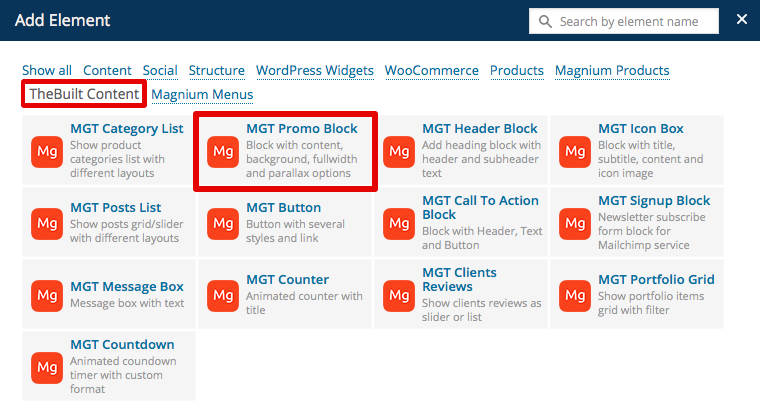
PROMO BLOCK
You can add special promo blocks with optional background image, hover effects, parallax effects buttons and much more. This blocks can be any size and very useful to create attractive interactive banners on your website. This is very powerfull theme element that allow you to create a lot of creative things and can be used in most of all of your website. Most of all our theme demo homepages created just with promo blocks with different settings, check theme demo pages to understand how we configured this blocks.
You can check live demo for this feature here.

How to use this element
- Open your Page/Post/Portfolio item and turn on Backend/Frontend Visual Page builder editor.
- Add new element by clicking + button
and choose MGT Promo Block:
- Read options descriptions in Settings window to understand how to use it. You can customize a lot of different options in this block and even show it fullwidth (inside fullwidth row).
- Save your page/post.
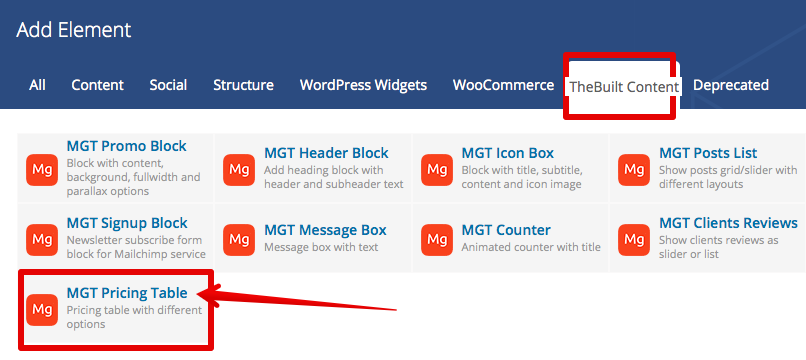
PRICING TABLE
You can add multiple pricing tables to your site, with different styles, colors, borders, icons, etc.
You can check live demo for this feature here.

How to use this element
- Open your Page/Post/Portfolio item and turn on Backend/Frontend Visual Page builder editor.
- Add new Row with several columns (for example if you want to have 3 pricing tables in one row you need to add Row with 3 Columns inside.
- Add new element by clicking + button
inside column and choose MGT Pricing Table:
- Read options descriptions in Settings window to understand how to use it. You can customize a lot of different options in this pricing table.
- Add / Dublicate more pricing tables to other columns.
- Save your page/post.
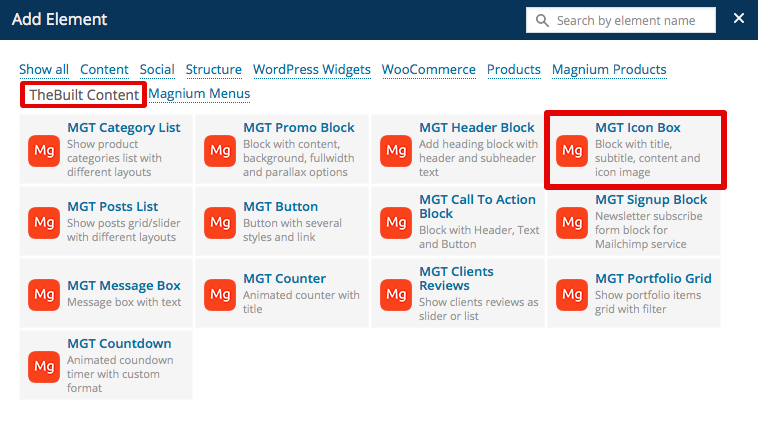
ICON BOX
You can add special preformated blocks with icons to your
content.
![]()
You can check
live demo for this feature here.
How to use this element
- Open your Page/Post/Portfolio item and turn on Backend/Frontend Visual Page builder editor.
- Add new element by clicking + button
and choose MGT Icon Box:
- Read options descriptions in Settings window to understand how to use it.
- Add your information to this block,
upload your icon, select layout.
- Save your page/post.
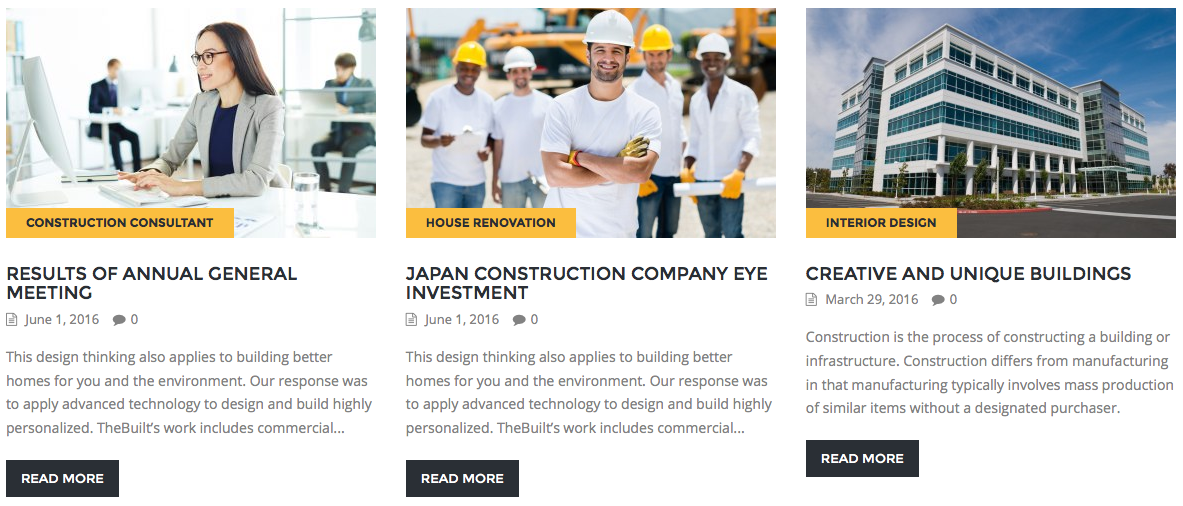
Posts Slider/Grid
You can show your blog posts as sliders or grids.
You can check
live demo for this feature here.
How to use this element
- Open your Page/Post/Portfolio item and turn on Backend/Frontend Visual Page builder editor.
- Add new element by clicking + button
and choose MGT Posts List element:
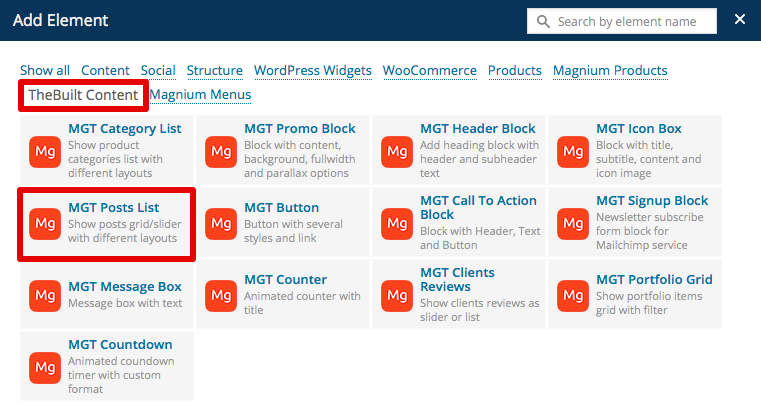
- Read options descriptions in Settings window to understand how to use it. You can select different layouts, slider options, grid display and more.
- Save your page/post.
Call to action block
You can attract your website visitors with special Call to Action
blocks with button.


You can check
live demo for this feature here.
How to use this element
- Open your Page/Post/Portfolio item and turn on Backend/Frontend Visual Page builder editor.
- Add new element by clicking + button
and choose MGT Call To Action Block element:
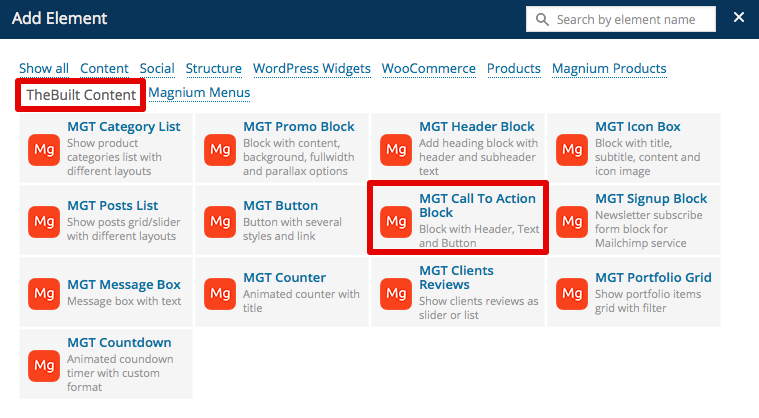
- Read options descriptions in Settings window to understand how to use it.
- Add your title, subtitle, text and button with url.
- Save your page/post.
Signup/SUBSCRIBE Block
You can add signup block that allow your users to subscribe to
your Newsletter by email via Mailchimp
service.

You can check
live demo for this feature here.
How to use this element
- Open your Page/Post/Portfolio item and turn on Backend/Frontend Visual Page builder editor.
- Add new element by clicking + button
and choose MGT Signup Block element:

- Read options descriptions in Settings window to understand how to use it. You can select different layouts, slider options, grid display and more.
- Select Text color, Background color, Signup text, Button text.
- You need to get your Mailchimp subscribe form ACTION
url:
- Login to your account at Mailchimp service.
- Go to Lists in top menu
- Around your subscribers list click little arrow
button and select Signup forms.
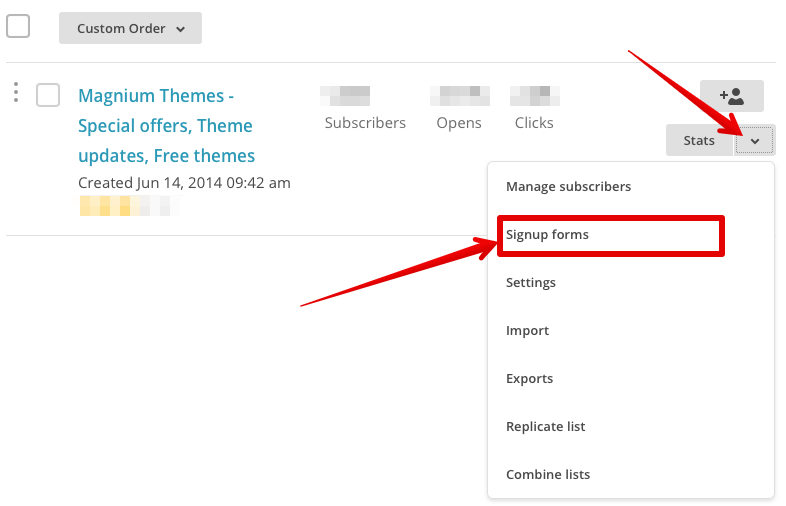
- Select Embedded forms.
- You will see your subscribe form HTML code, copy
it and paste to some text editor (for example to
Notepad or TextEdit.
You need to find your form action url inside this form code (bold code in sample below):
<!-- Begin MailChimp Signup Form -->
<div id="mc_embed_signup">
<form action="//magniumthemes.us8.list-manage.com/subscribe/post?u=6ff05dsafv19df7a7fc1c84e4ad&id=323285b358e7" method="post" id="mc-embedded-subscribe-form" name="mc-embedded-subscribe-form" class="validate" target="_blank" novalidate>
<div id="mc_embed_signup_scroll">
<h2>Subscribe to our mailing list</h2>
<div class="indicates-required"><span class="asterisk">*</span> indicates required</div>
<div class="mc-field-group">
<label for="mce-EMAIL">Email Address <span class="asterisk">*</span>
</label>
<input type="email" value="" name="EMAIL" class="required email" id="mce-EMAIL">
</div>
<!-- real people should not fill this in and expect good things - do not remove this or risk form bot signups-->
<div style="position: absolute; left: -5000px;"><input type="text" name="b_6ff051d919df7a7fc1c84e4ad_9285b358e7" tabindex="-1" value=""></div>
<div class="clear"><input type="submit" value="Subscribe" name="subscribe" id="mc-embedded-subscribe" class="button"></div>
</div>
</form>
</div>
In our sample code we are looking for this:
//magniumthemes.us8.list-manage.com/subscribe/post?u=6ff05dsafv19df7a7fc1c84e4ad&id=323285b358e7
- Add your subscribe form action url to Mailchimp subscribe form ACTION url field.
- Save your page/post.
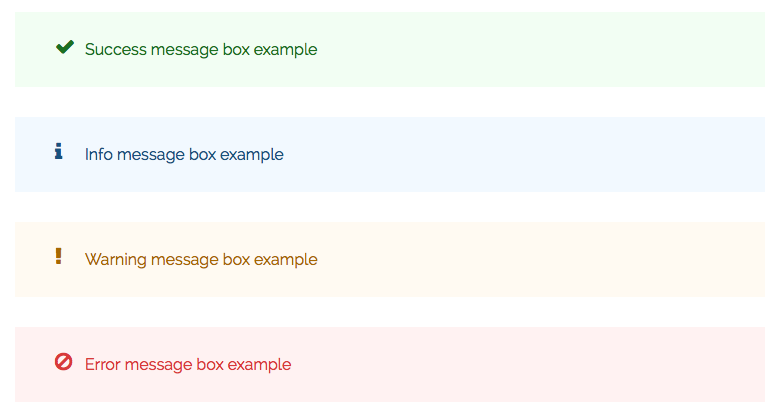
Message box
You can show different message boxes on your website to announce
something important.
You can check
live demo for this feature here.
How to use this element
- Open your Page/Post/Portfolio item and turn on Backend/Frontend Visual Page builder editor.
- Add new element by clicking + button
and choose MGT Message Box element:

- Read options descriptions in Settings window to understand how to use it.
- Add message box text, choose style.
- Save your page/post.
Portfolio grid
You can show your portfolio items with category filter in
different grids with different layouts on any of your pages.
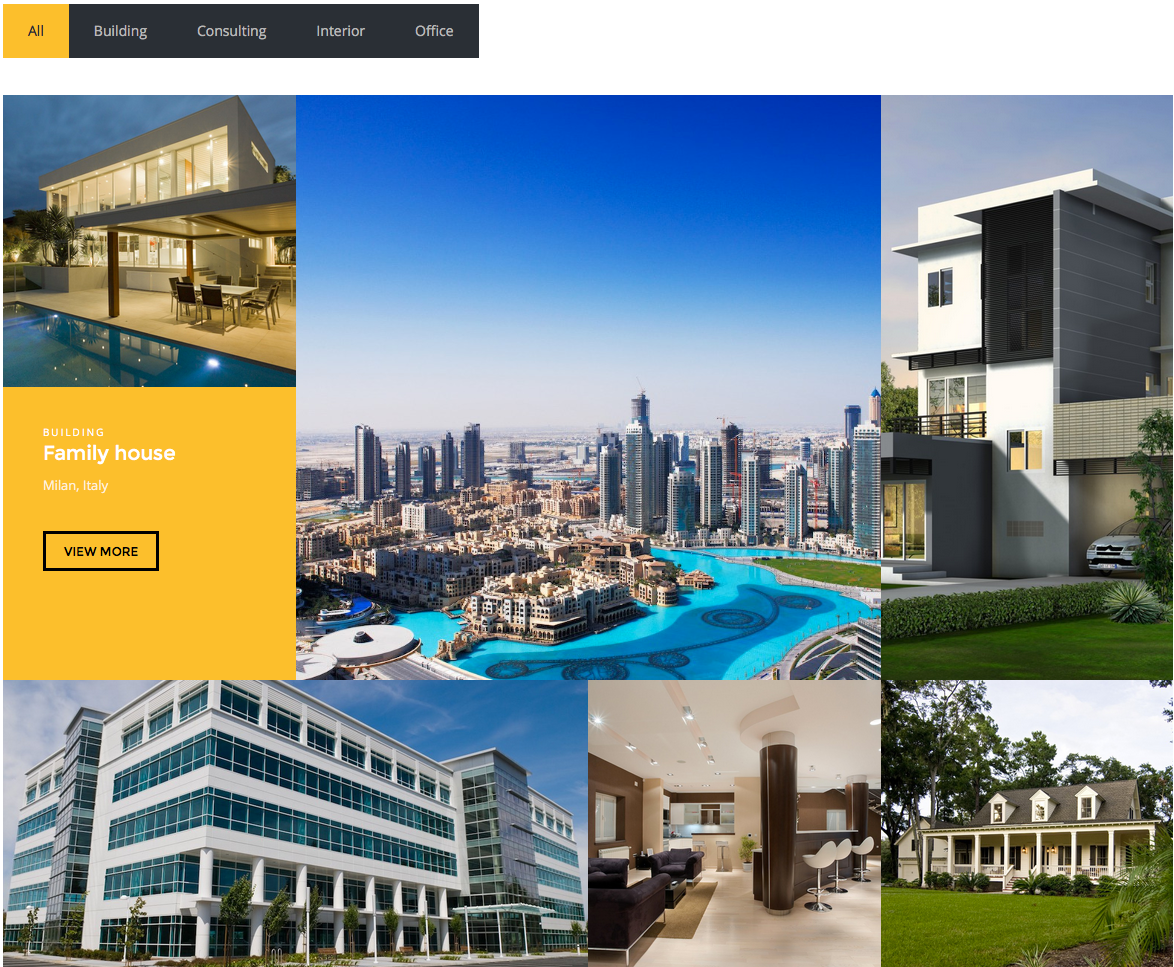
You can check
live demo for this feature here (Use Portfolio
menu at the top to check different demos).
How to use this element
- Open your Page/Post/Portfolio item and turn on Backend/Frontend Visual Page builder editor.
- Add new element by clicking + button
and choose MGT Portfolio Grid element:
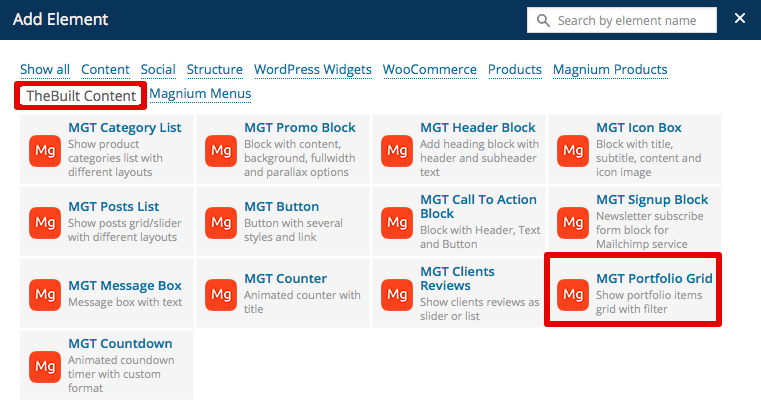
- Read options descriptions in Settings window to understand how to use it. You can choose different layouts and options for this element. You can show this element inside fullwidth row.
- Save your page/post.
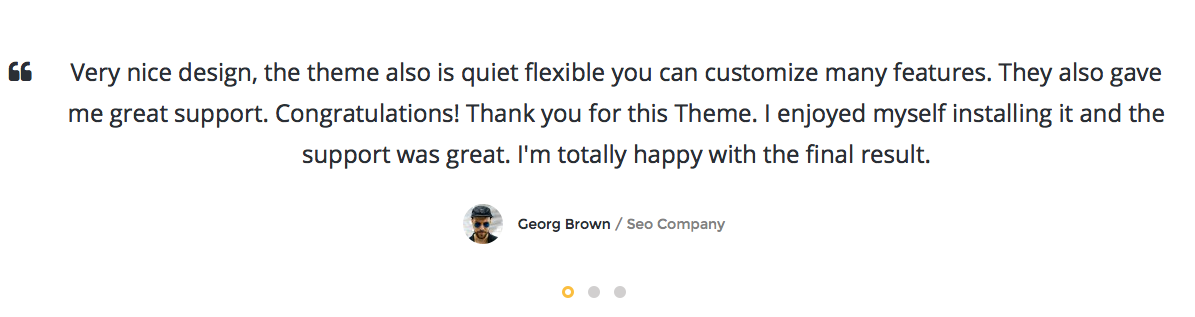
Client Reviews
You can add and show your Client Reviews as slider or grid on
your website.
You can check
live demo for this feature here.
How to use this element
- Go to Client Reviews > Add Review and add
few reviews with texts, titles (used for name and occupation)
and photos:

- Open your Page/Post/Portfolio item and turn on Backend/Frontend Visual Page builder editor.
- Add new element by clicking + button
and choose MGT Portfolio Grid element:
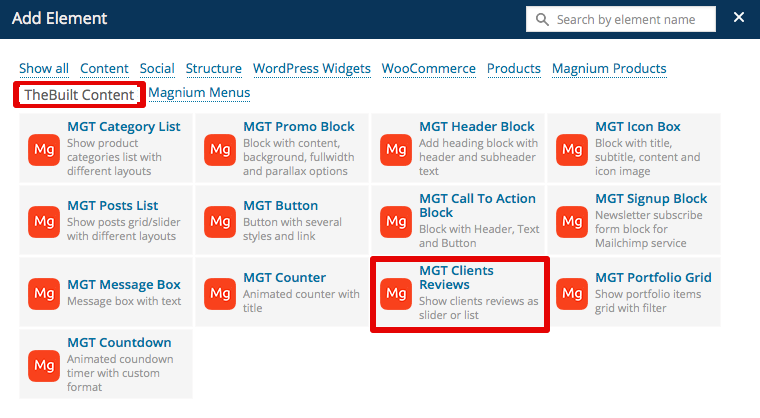
- Read options descriptions in Settings window to understand how to use it. You can choose different layouts and options for this element.
- Save your page/post.
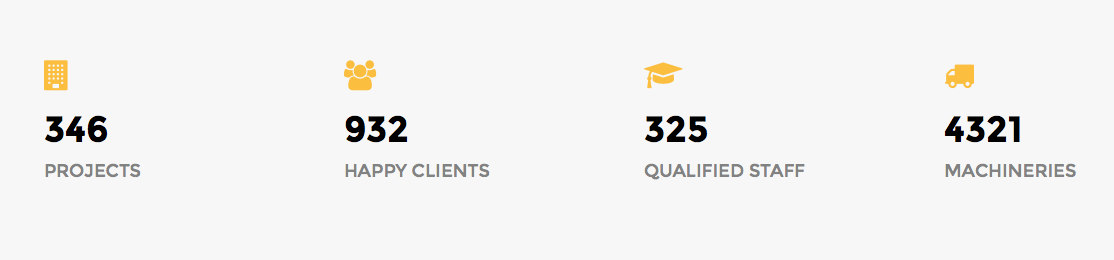
Counter
You can show your completed goals or achievements with special
animated counters that will count from 0 to your value when user
scroll page to this element.
You can check
live demo for this feature here.
How to use this element
- Open your Page/Post/Portfolio item and turn on Backend/Frontend Visual Page builder editor.
- Add new element by clicking + button
and choose MGT Counter element:
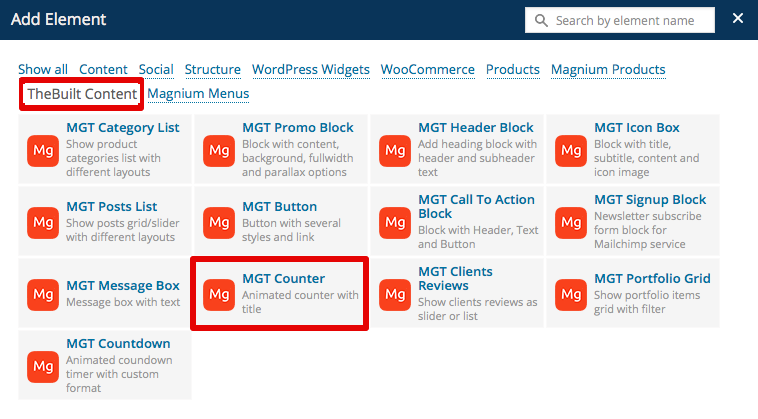
- Read options descriptions in Settings window to understand how to use it. You can choose different options for this element.
- Save your page/post.
Countdown timer
You can show countdown timer in different formats to show remaining timer for selected date.
You can check
live demo for this feature here.
How to use this element
- Open your Page/Post/Portfolio item and turn on Backend/Frontend Visual Page builder editor.
- Add new element by clicking + button
and choose MGT Countdown element:
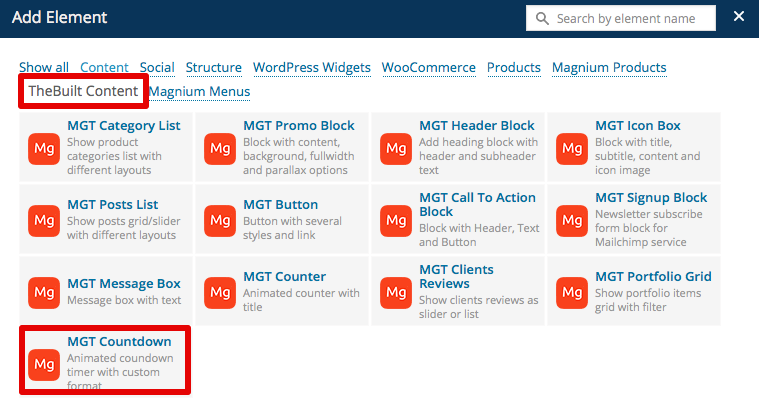
- Read options descriptions in Settings window to understand how to use it. You can choose different options for this element.
- Save your page/post.
Button
You can add different buttons to your website.

You can check
live demo for this feature here.
How to use this element
- Open your Page/Post/Portfolio item and turn on Backend/Frontend Visual Page builder editor.
- Add new element by clicking + button
and choose MGT Button element:
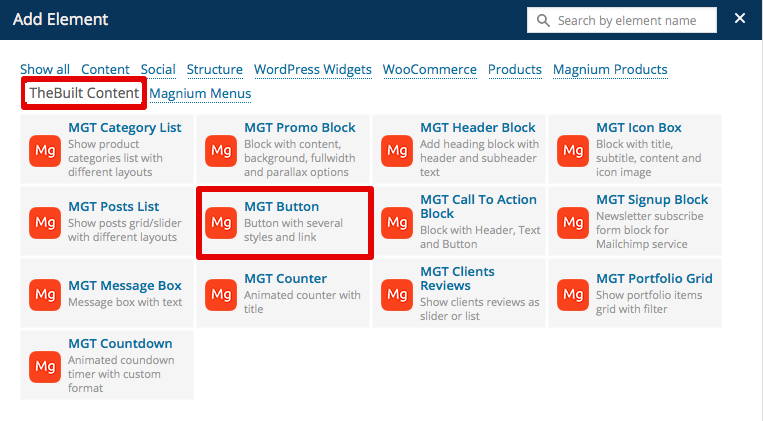
- Read options descriptions in Settings window to understand how to use it. You can choose different options for this element.
- Save your page/post.
Translations
This theme is translation ready and WPML plugin compatible and this mean you can easy adapt it to your language or use it multilanguage. You can translate theme manualy of using Translation plugin that we included with theme.
Manual theme translation
We included POT files for translation with theme:
- /wp-content/themes/thebuilt/languages/ - main theme translations
Read
this section on Wordpress website about WP translations.
Translation with provided THEME translation manager
If you installed and activated TheBuilt Translation Manager (plugin provided with theme) you can translate theme with it:
- Go to Loco Translate > Manage translations
- Click New language near TheBuilt theme in list
- Translate all theme strings in admin panel
WPML PLUGIN (MULTILANGUAGE WEBSITE)
Here is what you need to know on turning our theme multilingual with WPML.
First, you need to to purchase a recent version of WPML, including the String Translation and Translation Management modules. You can install WPML plugins automaticaly from TheBuilt Theme Control Panel > Multilingual (WPML) tab.
Please not that you need to purchase 1 additional Regular theme license for our theme for every language on your site. For example if you have your site versions in English, German and Italian languages you need to purchase 2 additional regular TheBuilt theme licenses (in addition to current one that you have for English).
Initial Setup
- Install and activate the core WPML plugins (WPML Multilingual CMS, WPML String Translation, WPML Translation Management), and then other WPML plugins that may depend on them.
- Set up WPML from WPML > Languages. See WPML Getting Started Guide for complete reference, but the initial simple three-step setup is self-explanatory, asking you to choose your default language, a set of active languages, and a language selector.
Translating Pages, Posts and other post types
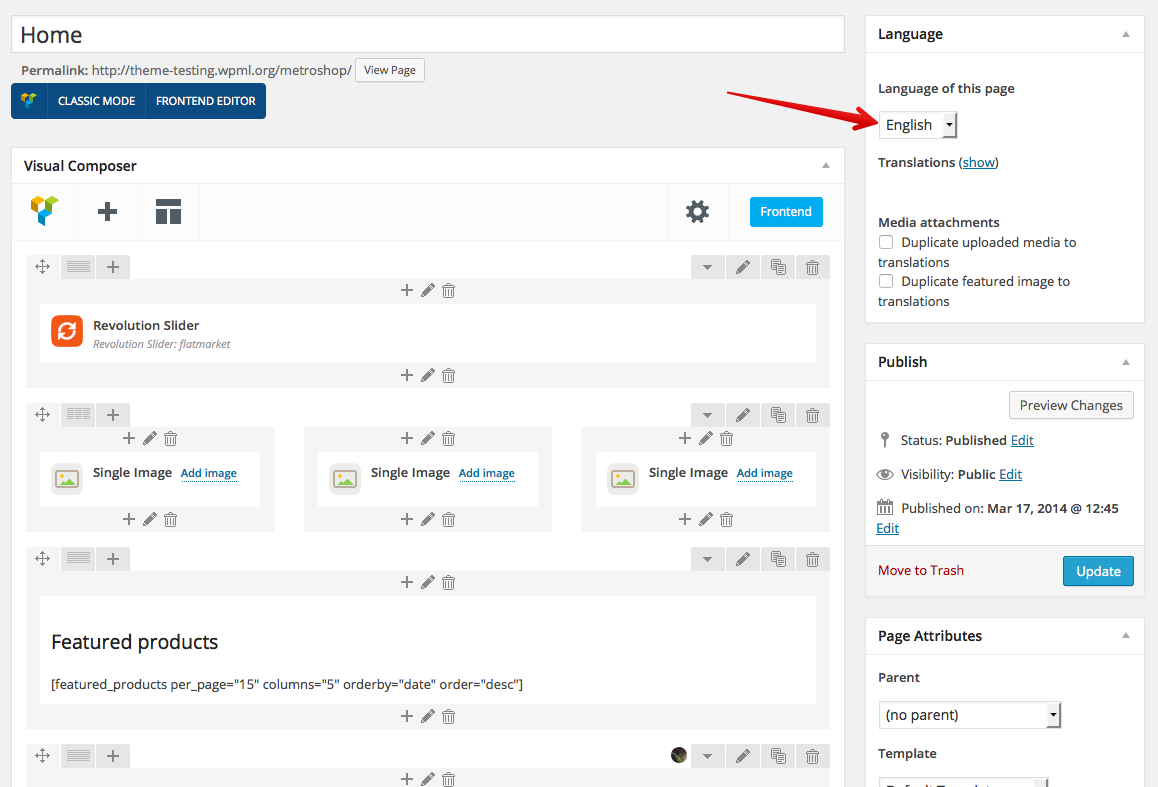
To translate a page you need to go to WordPress admin panel > Pages and in the list you will see columns for each active language, with a pencil icon (for edit translation) or a + icon (for add translation) next to each page. Go ahead and edit or add the translated page for your Homepage.
Right now you just need to translate your page into the new language:
Read this to easily duplicate your existing content.
Translating custom post types and taxonomies
Our theme and some plugins can have extra custom post types, and custom taxonomies. In order to get a similar interface for translation/duplication as for posts and pages, you need to go to WPML > Translation Management, and select the tab Multilingual Content Setup.
Translating Menus and Language Switcher in Header
WPML can synchronize menus for you. This means that if some entries, for example some pages, posts or categories, are in the English menu, WPML can generate and keep in synch menus for other languages pointing to the translated versions of these pages, posts or categories.
From WordPress Appearance > Menus you can see your existing menus and add menu translations and synchronize menus across translations.
To use Multi Currency on your website you need to install WooCommerce Multilingual plugin for WPML.
To show the language and currency switchers in the header you need to configure it in WPML and then activate it from Magnium Control Panel > Header.
Translating theme texts and other strings in your site
To translate strings you need to follow the procedure for Theme and Plugin Localization. Go to WPML > Theme and Plugin Localization, and click on Scan the theme for strings and you will see theme strings and which ones are translated or not.
Child theme usage
You can use our theme as Child theme. Check our special article how to do this.
Speed up your website
Our theme created for very fast and effective work, with correct server configuration and content optimization you can get 85-90 / 100 score in Google PageSpeed Insights test.
Site speed depends on several things in addition to theme (that already coded for extra fast work), like WordPress configuration, Server configuration and quality and Content optimization. We included simple guide how to optimize your website for extra fast work with our theme.
Useful advices for site Speed Up:
- Make sure that you have good hosting/server (we recommend to use Bluehost to host WordPress themes)
- Disable all third-party plugins that you does not use
- Check this official WordPress Optimization guide article and external article links in it. Follow all guides in it (especialy image optimization, server setup and optimization)
If you don't want to configure your website optimisation yourself you can order our special service:
- Order Premium WordPress Website Google Page Speed and SEO Optimization service on Envato Studio.
RETINA images SUPPORT
Our theme support retina feature, to add retina support for all images that you used in WordPress (posts, pages, etc) you need to install and configure special retina plugins for WordPress. We recommend to use one of this plugins:
You need to read this plugins documentation how to use this plugins and how to configure plugins correctly.
Theme Updates
You will see when theme update available on our website, our social profiles and in email from Themeforest (if you subscribed for theme updates notifications).
How to update theme - use Envato Market
plugin to update theme automatically.
- Do not update plugins bundled with theme yourself (even WooCommerce), before we will not add this updated plugins to our theme and tested it compatibility.
Support
We offer theme support and updates for our items.
If you have any questions about this theme you should:
- Submit support question in our support system
Please dont ask support questions in themeforest comments, email, skype, facebook or twitter - questions in this places will never be answered.